I’ve had many presenters ask if they can present in a Microsoft Teams or Zoom meeting with their video beside their PowerPoint slides so their facial expressions can be easily seen along with their slides. This is not how Teams and Zoom usually work. When you share your screen or slides, your webcam video is reduced to a small panel in the corner of the viewer’s screen. A viewer can swap the video and the slides but then the video is large and the slides are small (and unreadable). As a presenter you have no control over what format the viewer uses.
[Update: If you use Teams, the new Presenter modes offers the option to put your video on top of or beside the content you are sharing. Read this article that explains this new option and how to use it with slides.]
I’ve discovered a solution that gives you more control over what the viewers see without having to install additional software. The idea is to arrange our video and slides on our desktop and share the entire screen, so we control the size of both the video and the slides. This does not require you to install any software and uses the built-in features of Windows 10 and PowerPoint (for a Mac, read this article). There are five steps.
- Create a clean desktop
- Set up the PowerPoint slide show
- Set up the video feed
- Set up the desktop arrangement
- Share the screen in Teams or Zoom
Did you find this article using a Google search? Get more answers to your virtual presentation questions here and get updates of new articles and videos here.
New option for Zoom! Zoom now allows multi-window sharing. This article and video show you another way to share your video beside your slides in Zoom.
Create a clean desktop
This approach involves sharing our entire screen, so we need to make it as clean as possible so there are no elements that distract the viewer.
Turn off desktop icons
Right-click on the desktop and in the View sub-menu, uncheck the Show desktop icons item. This hides the icons that are on your desktop.
Close/Minimize all apps
We don’t want other apps to be seen, so close or at least minimize all apps except the PowerPoint window that contains the file you will be presenting.
Make the Taskbar disappear
The bottom of the desktop usually contains the Taskbar. We need to hide the taskbar in this approach. Right-click in an open area of the taskbar and click on Taskbar settings to open the Taskbar settings section. Set the Lock the taskbar to Off and Set the Automatically hide the taskbar in desktop mode to On.
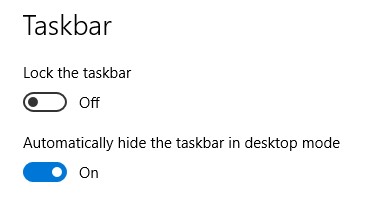
This will make the taskbar disappear. You can make it appear by moving your cursor to the bottom of the screen.
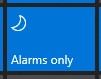
Turn on Focus Assist
To make sure notifications do not appear during your presentation, click on the Notifications area in the lower right corner of the screen. Click on the Focus Assist button until it changes to the Alarms Only state.
Set up the PowerPoint slide show
In this approach you will run your PowerPoint slide show in the PowerPoint window, not on the entire screen as is the default.
On the Slide Show ribbon, click on the Set Up Show button. In the dialog box, change the Show type to Browsed by an individual (window).
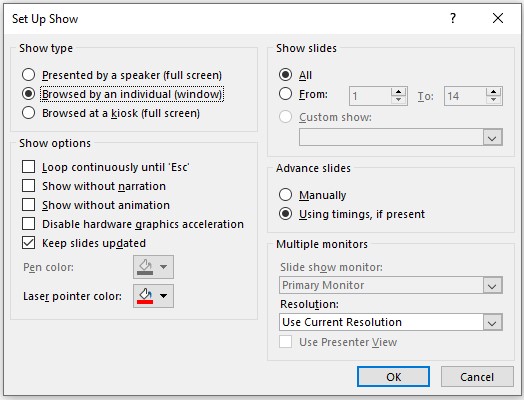
Because the slides will be beside the video window on the screen, you have the option to consider different sized slides that might fill the screen better when beside the video window.
Set up the video feed
Your video will be shown using the Windows 10 Camera app. Open the app and select your webcam as the camera source. If you have multiple cameras on your device, you can change the camera source by clicking on the Change camera icon in the top left of the app.
Select the Camera mode by clicking on the Take Photo icon in the vertical list to the right of the image.
If there is a focus box showing on the preview image, select the Take Video icon instead.
If you want to adjust the webcam settings, click on the gear Settings icon. If you are using an external webcam, this app may not have access to the camera settings and you may need to use the app from the webcam manufacturer to change settings.
You won’t be recording in this app, you will just be using the preview to make your video available on the desktop.
Set up the desktop arrangement
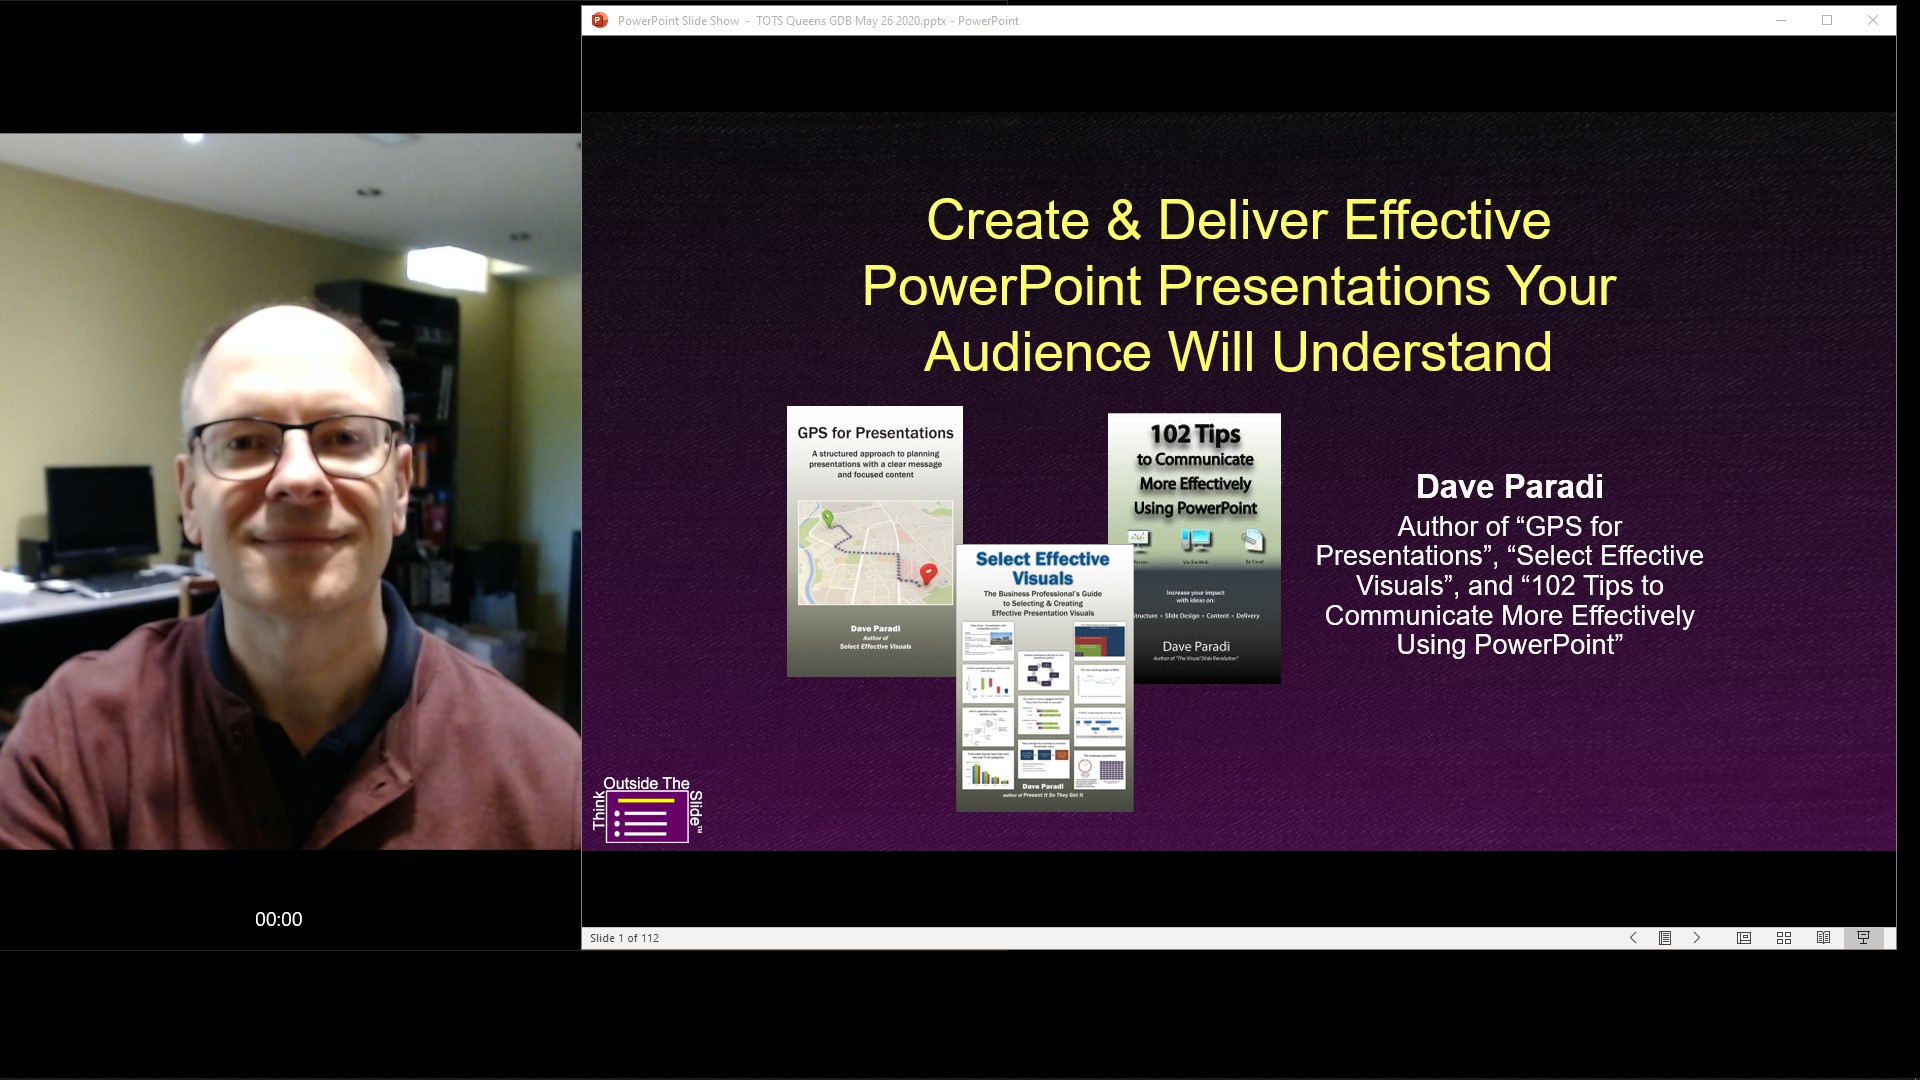
Arrange the desktop so you see as much of the video preview that you want and your slides beside the video window. The arrangement should be positioned close to the top of the desktop and fill the width of the desktop.
If you want the video on the left side and the slides on the right side, drag the Camera app window partially off the left side of the screen to crop the app window so you don’t see any icons to the left of the video. Position the PowerPoint window on top of the Camera app window so it crops the right side of the video and covers up the icons to the right of the video.
Share the screen in Teams or Zoom
When connecting to your Teams or Zoom meeting, do not share your webcam in the meeting. The webcam can usually only be connected to one app, so leave it connected only to the Camera app. If you need to share your webcam in the meeting, stop sharing it before you present.
Make sure the PowerPoint presentation is in Slide Show mode, which will show the slides only in the PowerPoint window. Then you can share your entire screen in Teams or Zoom.
If you are sharing the screen in Zoom, make sure to check the option at the bottom of the sharing dialog box to Optimize Screen Sharing for Video Clip. It will make your video much higher quality for the audience.
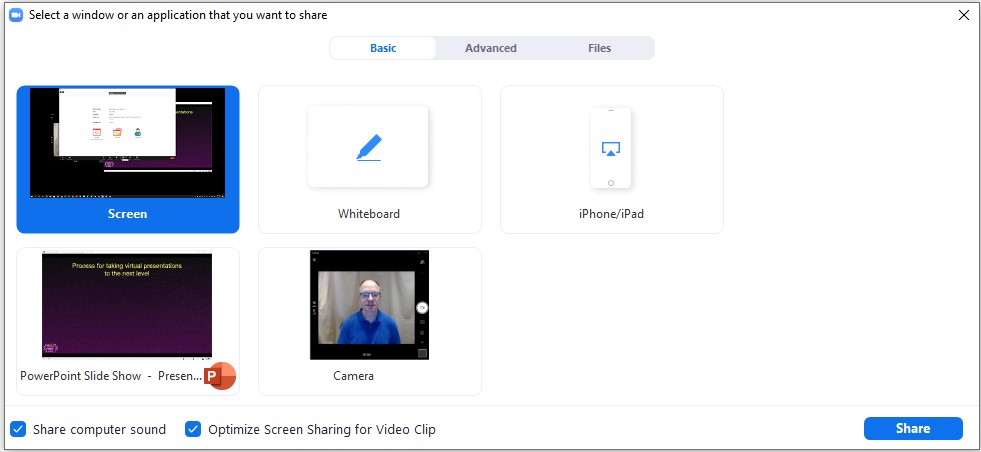
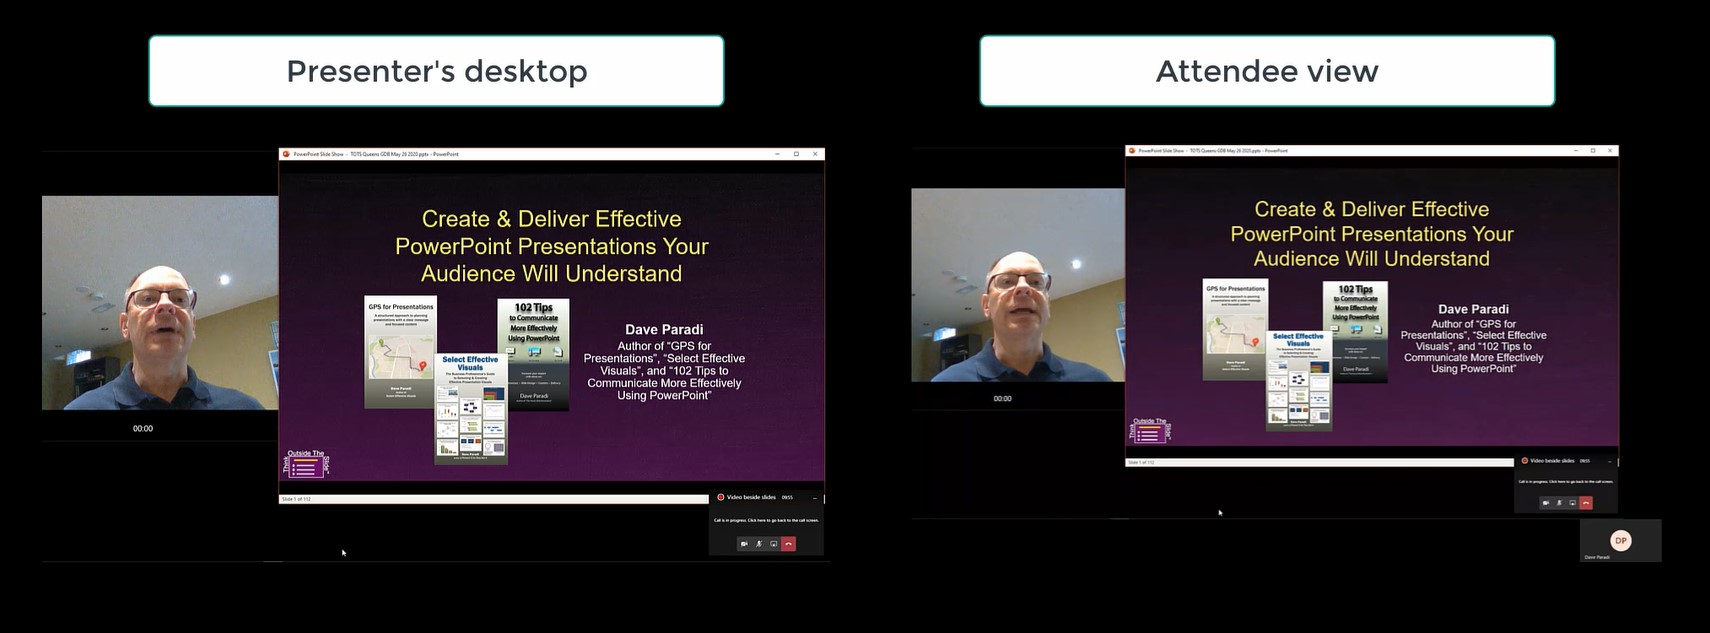
The viewer sees your video beside the slides because they are seeing the camera preview beside the PowerPoint window on the desktop.
When you are done your presentation, stop sharing your screen. Turn on the webcam in the meeting if you want to.
When the meeting is over, change back the settings for:
- Desktop icons
- Taskbar
- Focus assist, and
- Slide Show settings
Additional Tips
Here are some additional tips I’ve discovered while using this method to present and to record videos.
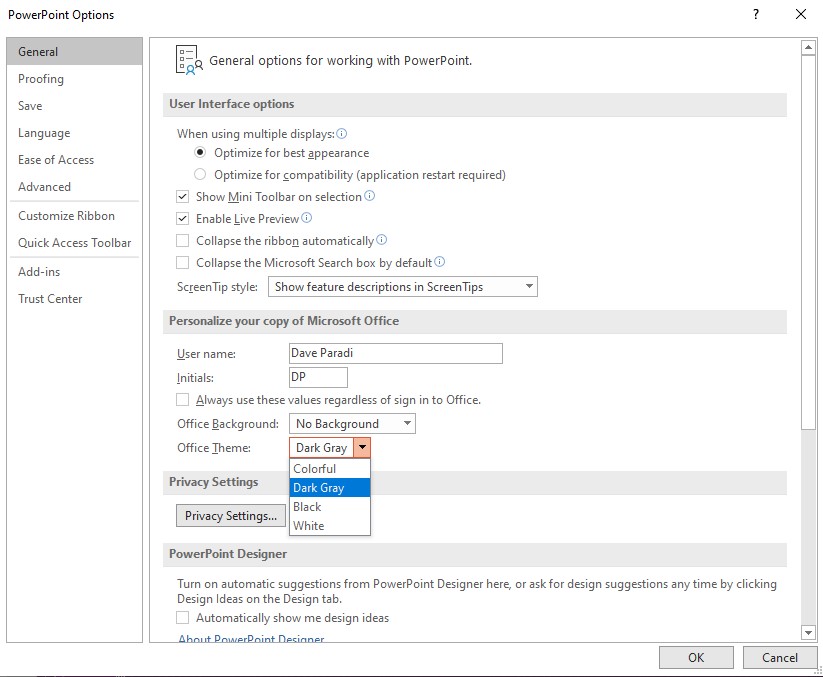
Use Dark Grey mode in PowerPoint
The default color theme in Office (& PowerPoint) is called Colorful. This places a thin red border around a PowerPoint window. This may appear as a red border between the video and the slides. If you want a less bold border, change the Office Theme to Dark Grey. In PowerPoint, click on File and select Options.In the General options, set the Office Theme to Dark Grey.
Stretch the Camera app tall
In video preview mode, the Camera app puts the time code below the video image. You can see the 00:00 time code in the screen capture images above. The time code always stays close to the bottom of the Camera window. If you stretch the Camera app window to be very tall, the time code will move away from the video image giving a cleaner appearance.
Size the PowerPoint window to have black bars at top and bottom
When you are sizing the PowerPoint window, I have found it best to have black bars at the top and bottom of the slides when in Slide Show mode within the window. This is especially helpful if you are using the Zoom advanced sharing feature to share a portion of the screen. It is easier to select a clean sharing area when you have known black bars above and below the slides.
Position the slides below the webcam
As much as possible, position the slides below the webcam. This allows you to look at the slides when presenting and it will appear like you are looking at the webcam. If the slides are off to one side, every time you glance at them, the audience will see your eyes move to that side.
Substitute a webcam manufacturer app for the Camera app
If your webcam manufacturer has an app that allows you to see a preview of the video feed and adjust settings such as zoom level, focus area, and lighting, consider using that app instead of the Camera app so you have more control over the video quality. If the app has a dark mode, that usually is best so that the white borders in the app do not distract the audience. Test this setup as sometimes these apps can cause a lag in the video that is sent to Teams or Zoom and your video will not be in sync with the audio.
Conclusion
Even if you don’t want to (or aren’t allowed to) install broadcast software on your computer, you can use the built-in Camera app along with showing the PowerPoint slide show in a window to put a video of yourself beside your slides when presenting in a Teams or Zoom meeting.
You can watch me show the steps to present with your video beside your slides in the video below.

Where to go next
–>More articles on virtual presenting –>Training for your team on presenting virtually
–>More articles on virtual & hybrid sales presentations –>Training for your sales team

Dave Paradi has over twenty-two years of experience delivering customized training workshops to help business professionals improve their presentations. He has written ten books and over 600 articles on the topic of effective presentations and his ideas have appeared in publications around the world. His focus is on helping corporate professionals visually communicate the messages in their data so they don’t overwhelm and confuse executives. Dave is one of fewer than ten people in North America recognized by Microsoft with the Most Valuable Professional Award for his contributions to the Excel, PowerPoint, and Teams communities. His articles and videos on virtual presenting have been viewed over 4.8 million times and liked over 17,000 times on YouTube.