Previous approach: sharing your desktop
In a previous article and video I shared how you can put your video beside your PowerPoint slides on a clean desktop and share that with the attendees in a Teams or Zoom meeting. This is an alternative to the small video window the meting platform uses by default. It also doesn’t require any extra software or hardware. It uses the Camera app in Windows or the Photo Booth app on a Mac for the video.
Zoom multi-window sharing a browser video for a new approach
Zoom has recently introduced multi-window sharing and I have discovered a new way to show your webcam video in a browser so now I want to share a new approach to showing your video beside your slides in a Zoom meeting. Teams doesn’t offer multi-window sharing so must still use the previous approach.
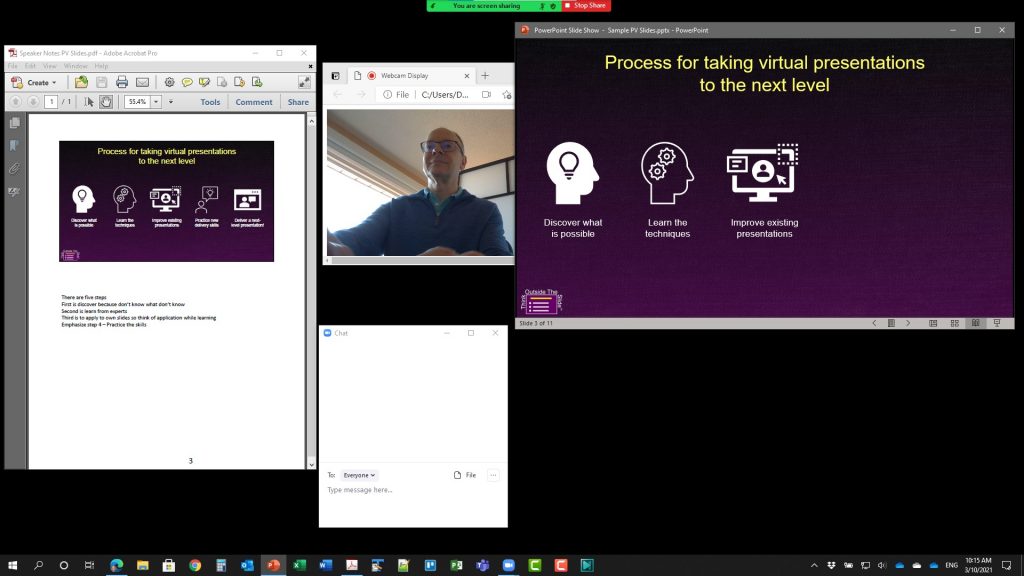
This approach does not require you to clear your desktop like the previous approach did so it allows you to have other apps including a PDF of your notes still visible to you while you present. Because it uses your video in a browser, you get a cleaner video window and it looks almost the same in Windows or on a Mac.
Showing your webcam in a browser
I noticed that some web pages request permission to use your microphone or camera. I wondered how they did that and whether it involved a lot of complex coding. It turns out that modern browsers can use the webcam feed with some very simple HTML and javascript code. As long as your security settings allow this code (and most should) this can work for you.
I adapted the code I found and have created a small HTML file that you can use to display your video in a browser tab/window. If you have other tabs open you can split this tab out to its own window usually by right-clicking on the tab and selecting to open the tab in a new window.
The text of the HTML file is below. You can copy it into Notepad in Windows or ?? on a Mac and save the file with the file extension of HTML. When you open that file, it will open in a browser. The browser will request permission to use your camera. Allow permission and it will use your default webcam. By using a local file instead of a website service, you make sure that your webcam feed is not going to some unknown server and it is faster because there is no lag to send the feed to a server and back.
A couple of limitations to note. First, your webcam must not already be in use by Zoom. If you already have the Zoom meeting started, turn off the webcam in Zoom. Second, if you have multiple webcams it will use the default one. In Windows there is no way to set the default webcam, it seems to be the one you last used in any software. Third, the code below displays a widescreen video window. You can change the width and height parameters in the code to change the dimensions and size of the video if you are comfortable changing code.
I must also say that the code is offered with no warranty or guarantee of any kind. If you choose to use it, you accept all responsibility and risk for what may happen. That may sound harsh but lawyers require that sort of language. I don’t offer the code as a downloadable file because downloading an HTML triggers all sorts of warnings and restrictions in a browser so you will have to copy the code and create your own file.
If you don’t want to use this file, you can still use the Camera app in Windows or Photo Booth app on a Mac to display your webcam video. Either approach will work with the next steps.
Code: Copy the code between the horizontal lines
<!DOCTYPE html>
<html>
<!-- based on https://www.kirupa.com/html5/accessing_your_webcam_in_html5.htm
 and https://developer.mozilla.org/en-US/docs/Web/API/MediaDevices/getUserMedia -->
<head>
<meta charset="utf-8">
<title>Webcam Display</title>

<style>
<!-- adjust the width and height in both of these code sections to control the size of the video-->
#container {
                margin: 0px auto;
                width: 500px;
                height: 281px;
                border: 2px #333 solid;
}
#videoElement {
                width: 500px;
                height: 281px;
                background-color: #666;
}
</style>
</head>

<body>
<div id="container">
                <video autoplay="true" id="videoElement">
                </video>
</div>
<script>
var video = document.querySelector("#videoElement");

// Gets a widescreen video from the camera; can change to square if desired

if (navigator.mediaDevices.getUserMedia) {
  navigator.mediaDevices.getUserMedia({ video: {width: {ideal: 1280 }, height: { ideal: 720 } } })
    .then(function (stream) {
      video.srcObject = stream;
    })
    .catch(function (err0r) {
      console.log("Something went wrong!");
    });
}
</script>
</body>
</html>
Run the slide show in a window
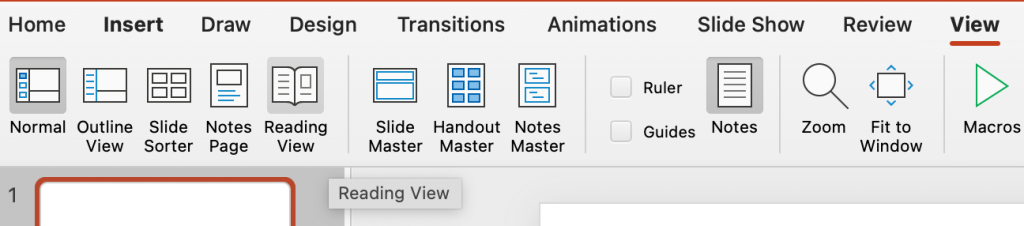
The key to sharing your slides beside the video window is to run the slide show in a window instead of full screen. In PowerPoint, this is known as Reading View. It has almost all the features of Slide Show mode but it runs in the PowerPoint window instead of full screen.
There are two ways to display Reading View in PowerPoint. The first is to use the Reading View button on the View ribbon (Windows and Mac screen shots shown below).

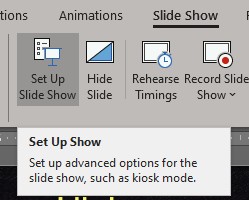
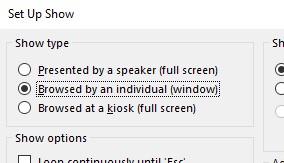
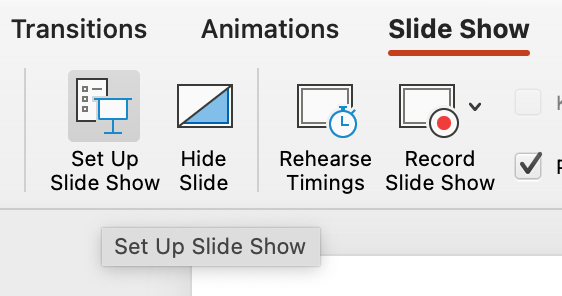
The second is to set the Show type in the Set Up Show dialog to be “Browsed by an individual (window).” You access this dialog by click on the Set Up Show button on the Slide Show ribbon (Windows and Mac screen shots shown below).

Once this Show type is set, you can use the usual Start Slide Show buttons to start the slide show and it will display in the PowerPoint window instead of full screen.
Arrange the windows on your desktop
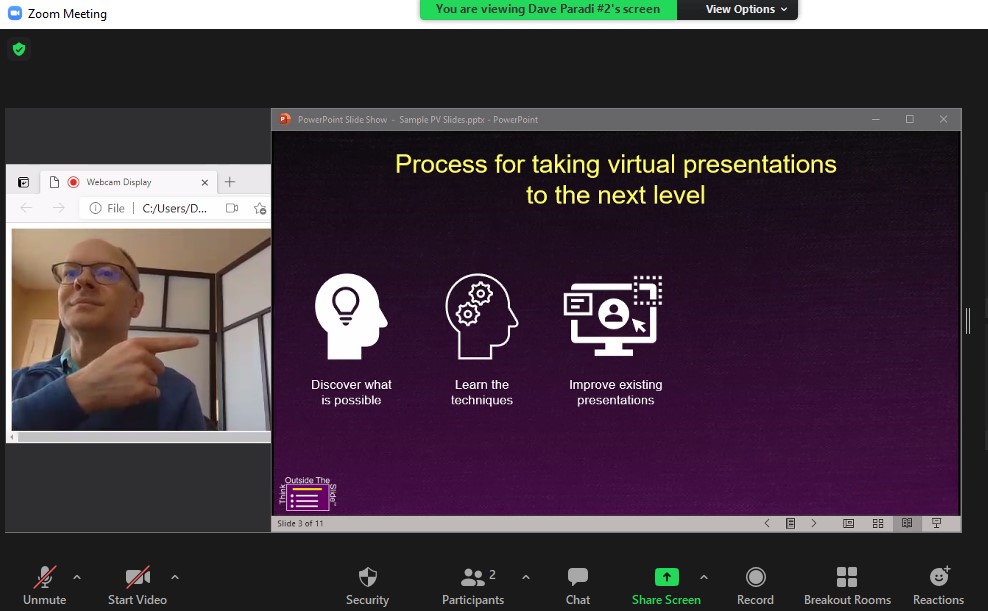
When you use Zoom’s multi-window sharing, it displays the windows as you have them arranged on your desktop. Decide which side you want your video to be on and whether you want the slide window to overlap any of the browser window.
Use Zoom multi-window sharing
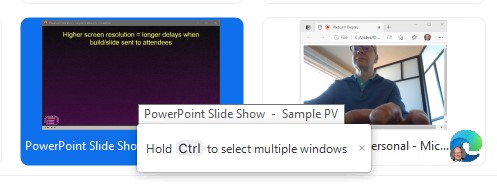
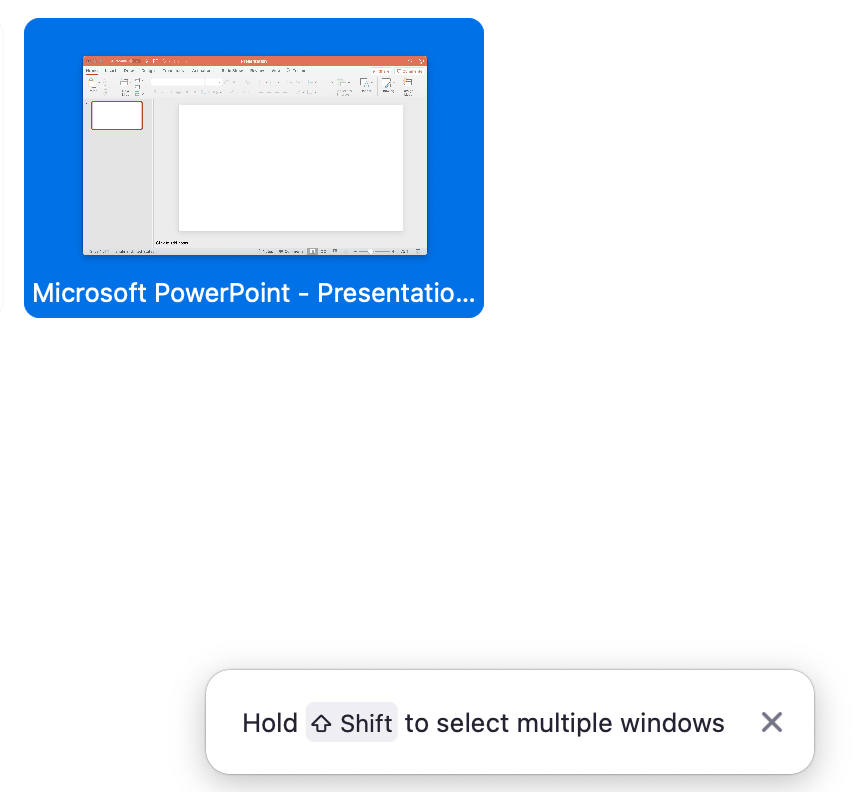
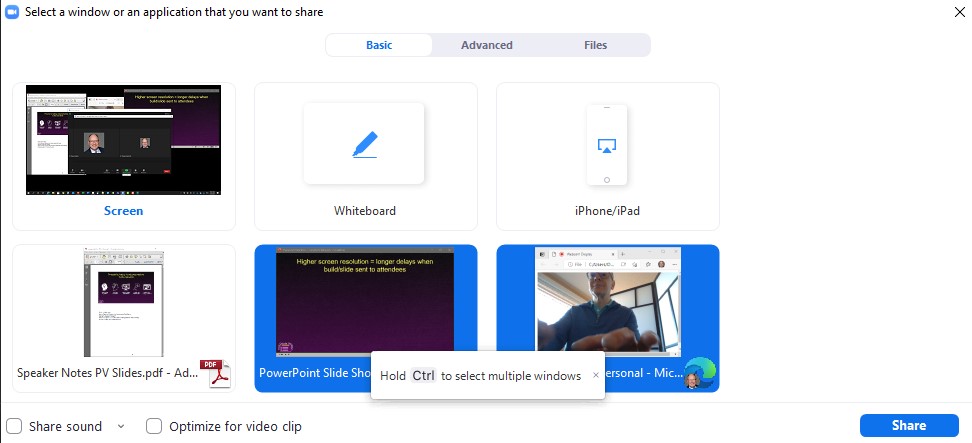
When you are ready to share both windows, use Zoom’s sharing dialog as you normally would. After you click on one of the windows you will see a small message pop up telling you how to select multiple windows. In Windows you hold the Control key and click on the other window. On a Mac you hold the Shift key and click on the other window (Windows and Mac screen shots shown below). In my experience it does not matter what order you select the windows.
When both windows are selected, click the Share button.
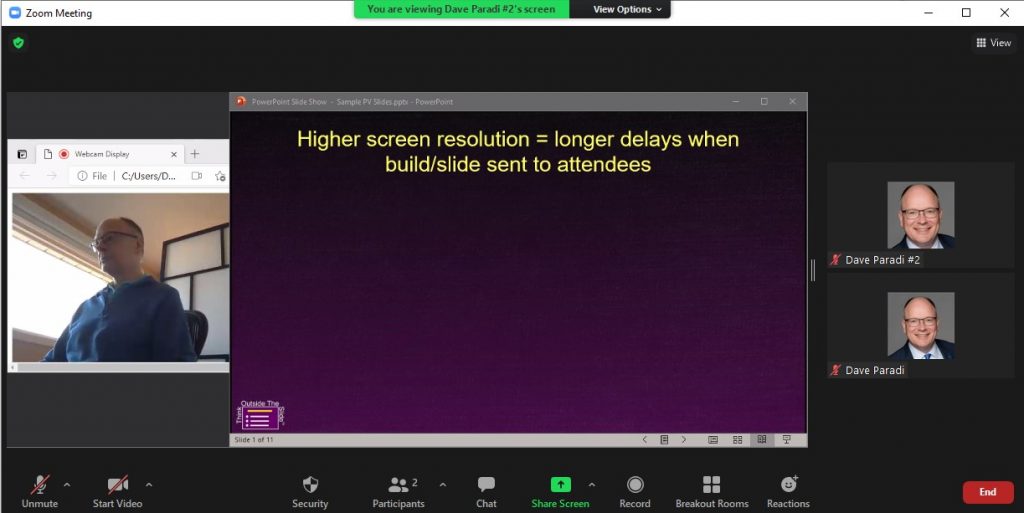
Here’s what the meeting attendees see. Zoom fills in any extra space that the windows do not take up with a dark grey background.
Deliver your presentation
Now you can deliver your presentation as you normally would. Because you are just sharing two windows you can have other windows open on your screen such as the chat, meeting controls, or your speaking notes.
Since you know what side of the slides you are on you can gesture towards the slides to make a point if you want to.
If you do click on another app window such as the chat or meeting controls, click on the bottom bar of the PowerPoint window to return focus to the slide show so you can continue with the presentation. Don’t click on the slide or it will advance the next build. You can use a presentation remote if you want to as Reading View will recognize it as a way to advance the slides.
When you are done, stop sharing and switch the camera back to Zoom
When you have finished your presentation, stop sharing and Zoom will stop sharing both windows. If you want to continue in the meeting with your video available for the other attendees, close the browser window to release the webcam back to the system. Then turn on the camera in the Zoom controls so your video feed is now in the meeting along with the videos from other participants.
Zoom and Teams will offer more options in the future, likely with limitations
Zoom and Teams have announced that they will be offering more options for arranging your video and your shared content in a meeting. We don’t have all the details yet but I expect that there will be limitations on how it works. Zoom’s feature to put your video in front of slides works only if you convert your slides to images, which means you lose all animations and transitions such as Morph.
The approach above and the previous approach I shared give you the flexibility to share your video and slides (& other content if you want) in the way that makes it most engaging for your attendees.
Video
To see these steps in Windows, watch this video.
Where to go next
–>More articles on virtual presenting –>Training for your team on presenting virtually
–>More articles on virtual & hybrid sales presentations –>Training for your sales team

Dave Paradi has over twenty-two years of experience delivering customized training workshops to help business professionals improve their presentations. He has written ten books and over 600 articles on the topic of effective presentations and his ideas have appeared in publications around the world. His focus is on helping corporate professionals visually communicate the messages in their data so they don’t overwhelm and confuse executives. Dave is one of fewer than ten people in North America recognized by Microsoft with the Most Valuable Professional Award for his contributions to the Excel, PowerPoint, and Teams communities. His articles and videos on virtual presenting have been viewed over 4.8 million times and liked over 17,000 times on YouTube.