Perhaps the single biggest challenge to presenting virtually from home has been how to see your speaking notes and share your slides in PowerPoint if you only have one screen or monitor (likely your laptop screen). This has been a challenge for presenters on all platforms: Zoom, Teams, Webex, Google Meet, and others.
I have published previous articles and videos with solutions such as sharing a portion of the screen in Zoom (Windows or Mac), adding a ghost monitor to have a second screen (Windows or Mac), and using a PDF of your notes beside your slides running in a window (general approach and additional tips for low-res screens).
In this article I want to share another approach that uses a feature in PowerPoint on Windows called Slide Show Preview. This feature has been around for many years and is usually used as a way to quickly check animations and transitions when developing slides. The Mac version of PowerPoint does not have this feature.
Overview
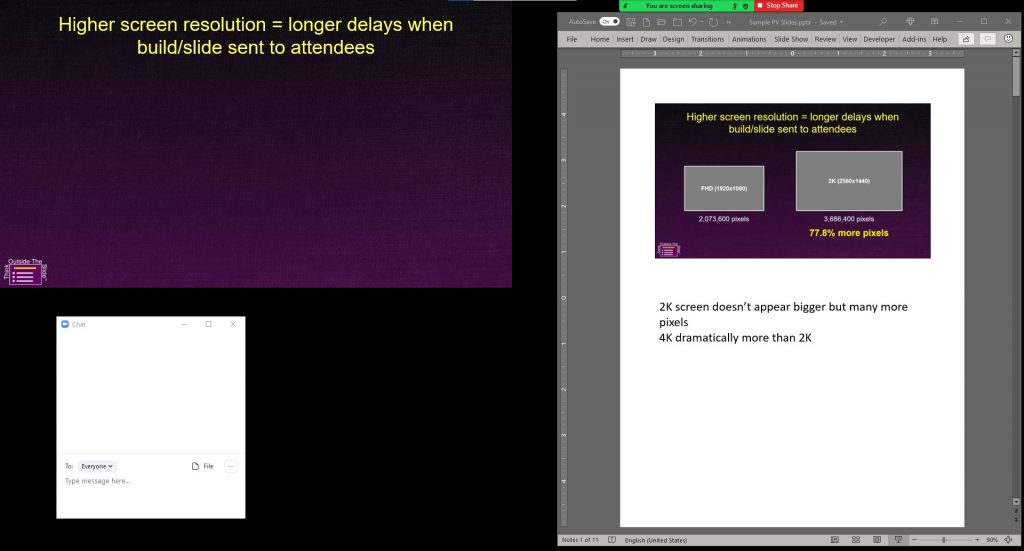
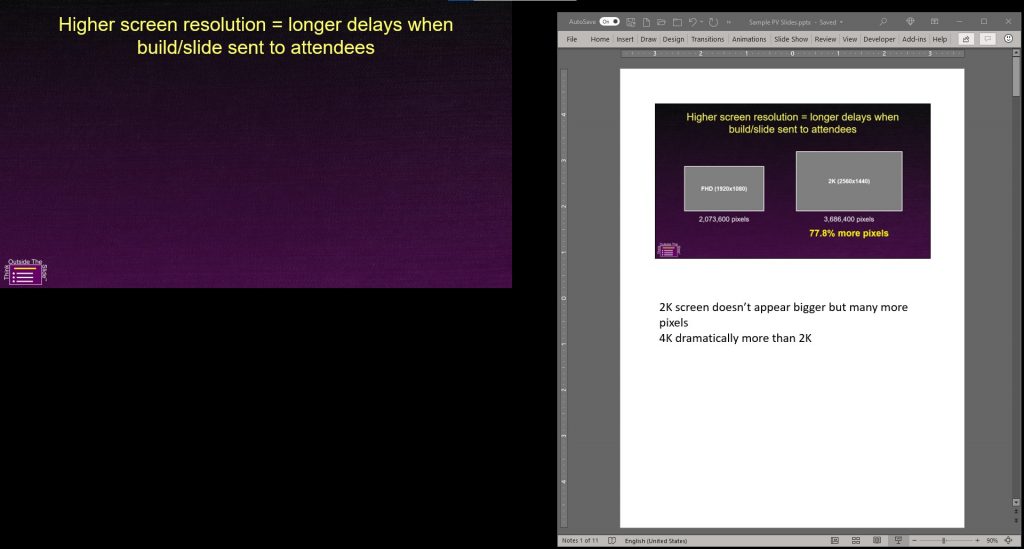
This approach involves running the Slide Show preview that covers the top left quarter of your screen with the slide show so you can share the slides in the meeting. On the right side of the screen you view and scroll through the Notes view in PowerPoint so you can see the current slide and notes while you are presenting. The lower left of your screen can contain the meeting chat or attendee videos. Here’s what this looks like when presenting.

Set up & Display Notes View
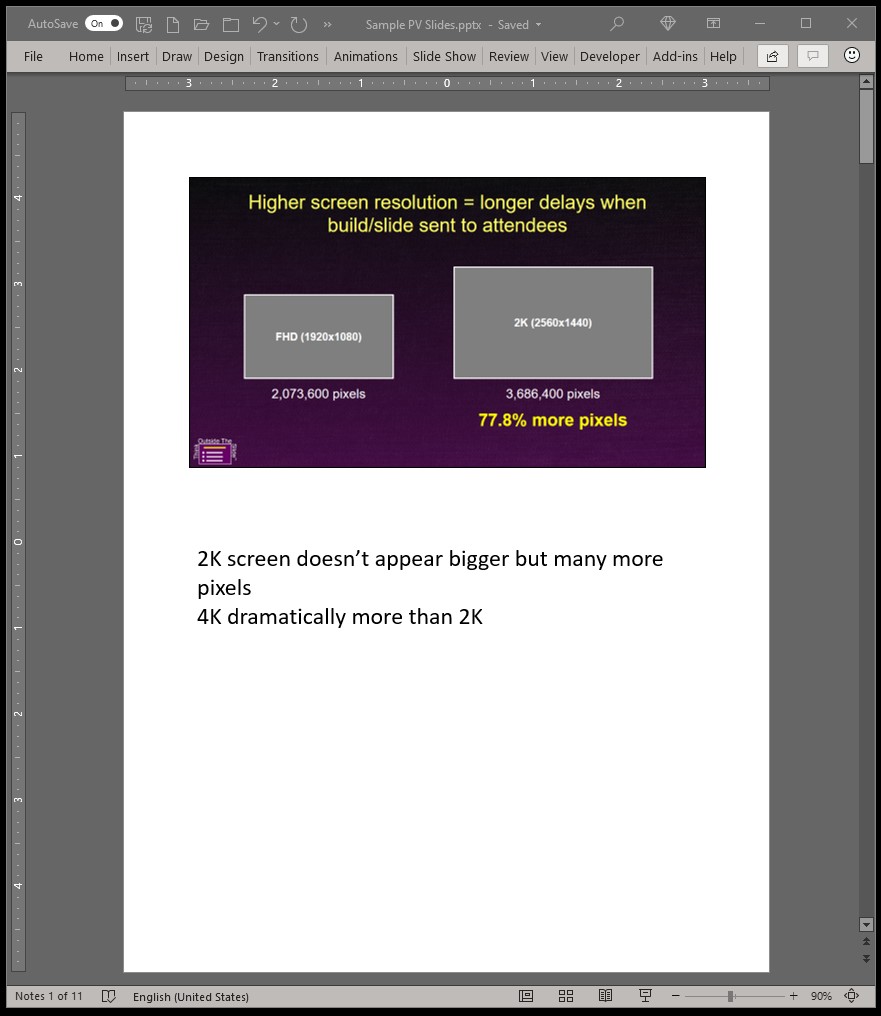
The Notes Master controls how the Notes view looks on the screen. Click on the Notes Master button on the View ribbon to edit the Notes view. I recommend increasing the font for the notes text so it is easier to read. You can also adjust the size of the slide image. If you have a lot of notes or need to make the font very large, you can make the slide image smaller. Click the Close Master View button once you have the Notes view the way you want it.
Display the Notes view by clicking on the Notes Page button on the View ribbon. This shows you the current slide and notes in the format you set in the Notes Master. Resize the PowerPoint window so it takes up only the right side of the screen and it is oriented in a portrait direction similar to the Notes page.
To make the page even larger, hide the ribbon using the up arrow in the lower right corner of the ribbon. Adjust the zoom level of the view using the zoom controls in the lower right of the PowerPoint window. Make sure that when you scroll with the mouse wheel it moves one page for each wheel click. If it takes two clicks to scroll to the next page, make the zoom slightly lower as PowerPoint thinks it needs to scroll down the page before going to the next page.

If the text is not large enough, go back and adjust it in the Notes Master.
Open Slide Show preview
Since you only have one screen, you should not have to turn off Presenter View on the Slide Show ribbon or set the Monitor to your primary monitor (if you are using this approach with multiple monitors you will need to change both of these settings).
Start Slide Show preview by holding the Alt key and clicking on the Slide Show icon in the lower left footer of the PowerPoint window. This will start the slide show from the current slide in a window that takes up the top left quarter of your screen.

Share Slide Show Preview in the meeting
In the meeting platform use the window sharing mode to share the Slide Show preview window. It is important that the Notes page window does not overlap the Slide Show preview window. If it does, the audience will see the overlapping portion as well. While it appears that the Slide Show preview window and the PowerPoint window with the Notes pages are two different windows, they are actually treated as a hybrid in the operating system and will show when overlapped.
If the meeting platform controls are at the top of the screen, they may be on top of your slides. You should be able to move the meeting platform control bar by dragging it slightly to the right so you can see the top of your slides.
Advance slides and notes
When using this approach you can see the slide that is being shared with the attendees and you can see your notes (that the attendees can’t see). The operating system focus should be on the Slide Show preview. If it is not or you click somewhere else on the screen, just click on the Slide Show preview window to return focus to that window.
Use the arrow keys on you keyboard to advance the builds and slide in the slide show. Use your mouse wheel to scroll through the Notes pages. Do not click on the Notes pages to move them, just scroll with the mouse wheel. If you click on the Notes pages you move the operating system focus to the Notes pages.
A good habit to employ when using this approach to present is to use the arrow keys to advance the builds on a slide. When you move to the next slide, pause a moment to advance the Notes pages with the mouse wheel. The attendees won’t notice the pause and it gives you time to make sure that your notes and slide are in sync.
Use Slide Show tools
The Slide Show preview is full Slide Show mode so you can use all of the Slide Show tools like the drawing tools, zooming in on a slide, and jumping to another slide using the thumbnails. You can access all of these tools through the semi-transparent menu that appears in the lower left corner of the Slide Show preview when you move your mouse over the slide. The attendees will see everything you do since the window is being shared with them.
Stop Sharing and Exit Slide Show preview when done
When you are finished your presentation, stop sharing the Slide Show preview window in the meeting. You can then exit Slide Show preview by pressing the Escape key as you would when using the regular Slide Show mode.
You will likely want to resize your PowerPoint window and return to the Normal view. If the ribbon is hidden you can display the full ribbon again by clicking on the pin icon in the lower right corner of any ribbon when it is displayed.
Find an approach that is comfortable for you
If you only have the one screen or monitor for a virtual presentation, you have different options for seeing your notes and sharing your slides with the meeting attendees. The approach in this article might be the one that you are most comfortable using.
Video of this approach
See me demonstrate this approach in the video below.
1 or 2 screens?
Teams, Zoom, or Webex?
Windows or Mac?
Sign up to download my best tips for your virtual presentation situation and stay updated as the technology changes.
Where to go next
–>More articles on virtual presenting –>Training for your team on presenting virtually
–>More articles on virtual & hybrid sales presentations –>Training for your sales team

Dave Paradi has over twenty-two years of experience delivering customized training workshops to help business professionals improve their presentations. He has written ten books and over 600 articles on the topic of effective presentations and his ideas have appeared in publications around the world. His focus is on helping corporate professionals visually communicate the messages in their data so they don’t overwhelm and confuse executives. Dave is one of fewer than ten people in North America recognized by Microsoft with the Most Valuable Professional Award for his contributions to the Excel, PowerPoint, and Teams communities. His articles and videos on virtual presenting have been viewed over 4.8 million times and liked over 17,000 times on YouTube.
