Why present using a PDF and not PowerPoint?
If given the choice, I suggest you present using PowerPoint with your own laptop. You get all the advantages of PowerPoint and you are familiar with the setup. Unfortunately you aren’t always in a situation where this is possible.
In a hybrid meeting setup you may be using another computer and it may not have the same version of PowerPoint (or doesn’t even have PowerPoint). To make sure your slides show the way you created them you may choose to use a PDF file of your slides. You may have had to provide a PDF file in advance to the meeting organizer and they insist that you present the exact file they have distributed to the attendees.
Your presentation may have been designed in a program other than PowerPoint and PDF is the only reasonable output format you can get. Or you may have used an online service and want to be able to present in a situation where there is no internet.
While it is not ideal, you may be forced to present your slides using a PDF of the slides. In this article I want to share how you can still make this a successful presentation. I will focus on PDF files created from PowerPoint but will also comment on Google Slides and Keynote on the Mac. I will give instructions for presenting using the Edge browser on Windows or the Mac.
Creating the PDF of your slides from PowerPoint (or other software)
What you lose when saving as a PDF file
Because PDF files are based on static pages in a document, you will lose any animations or transitions you have on your slides in PowerPoint or other programs. If builds are important to you, consider creating multiple slides instead of one slide with build animation. Later in this article I share some ideas on building navigation into your slides so consider adding any links to your slides before creating the PDF file.
You will also lose any media on the slides, such as videos. The PDF version of the slide will show the starting frame of the video object as an image. If you want to show a video, I suggest you host it on a private sharing service such as Vimeo Basic, load it in an additional browser tab and switch to that tab during the presentation.
Saving a PDF of your slides
In PowerPoint, use the Save a Copy function on the File tab to create the PDF file. Use the file type dropdown to select the PDF file format as the file type to save.

Do not use the method to print to a PDF because it will lose any links you have built into the file.
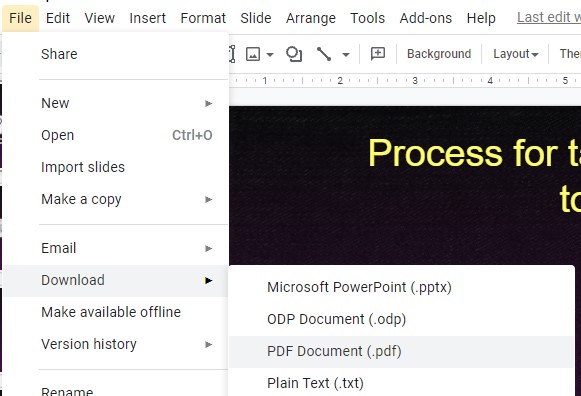
In Google Slides, use the Download as a PDF file to create a file that preserves any links.
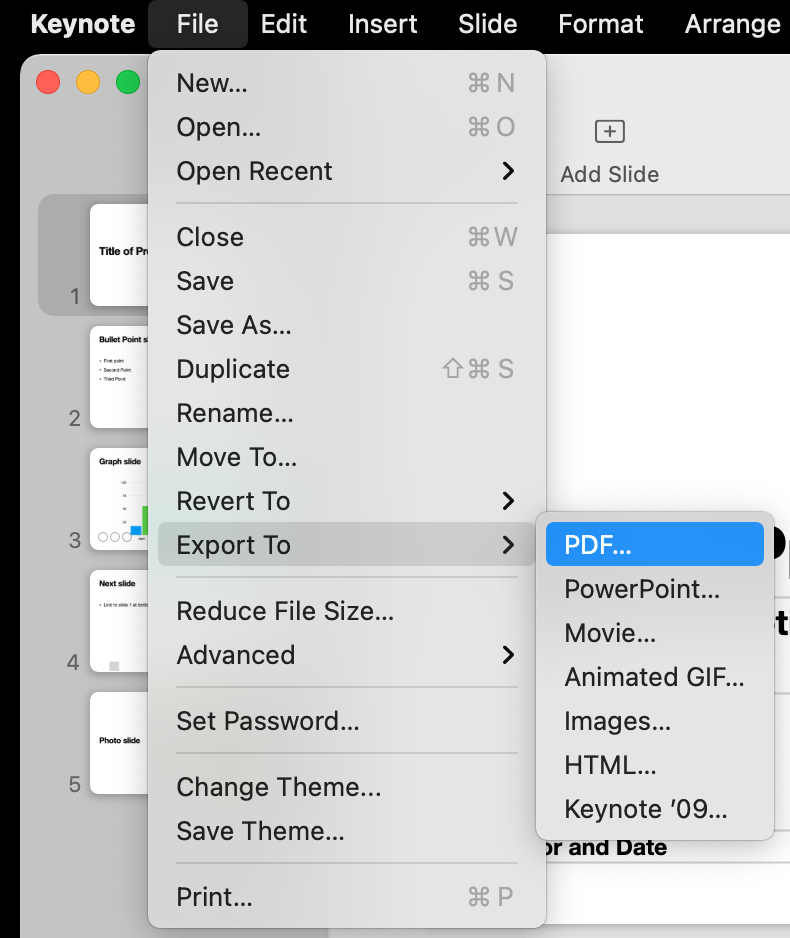
In Keynote on the Mac, use the Export to PDF to preserve links in the PDF file.
Other software that saves slides as a PDF may or may not preserve links, you will have to test it.
Regardless of what software was used to create the PDF file, almost all of the rest of this article will apply. The PDF file will have each slide as a page so I will refer to both slides and pages which are the same thing in the PDF file.
Displaying the PDF slides
Open the PDF in the Edge browser
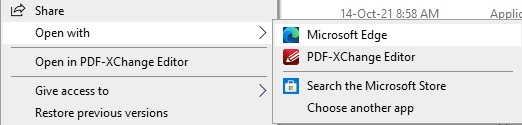
The best way to present a PDF file of slides is to open the file in the Edge browser. This browser from Microsoft is available for free on both Windows and the Mac. It comes as the default browser in Windows. If it is not the default browser on your computer, you can open the PDF file in Edge by right-clicking on the file in File Explorer (or Finder on the Mac) and selecting to Open the file in Edge.
Make pages scroll one at a time
To make the slide pages scroll as pages, use the Fit to Page option in Edge. The easiest way to get to this option is to click on the Fit to width button first (highlighted in the screen capture below).

Then click on the Fit to page button (highlighted in the screen capture below) that is now in the same spot on the Edge PDF toolbar.

The button will switch back to the Fit to width button.
Adjust the size of the browser window so it fits the size of the slide. This way the attendees only see one slide at a time and aren’t distracted by a portion of the next slide at the bottom of the window.
Use the Dark theme if desired
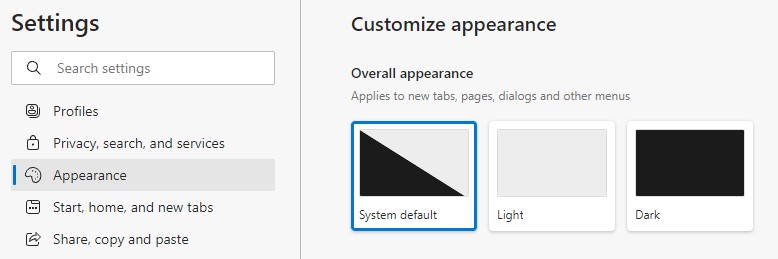
If you want, set the Edge appearance setting to use the dark theme which will make the browser menu, tabs, and border less prominent. You can access the Edge settings in the menu that appears when you click on the three dots in the top right corner of the browser. In the Appearance section, select the Dark theme.
Hide the Edge PDF toolbar if desired
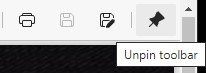
If you want to have a cleaner look, you can unpin the Edge PDF toolbar. This makes it disappear after a few seconds. It will appear again if you move your cursor to the top of the PDF page. Use the pin icon on the right side of the PDF toolbar to pin or unpin the PDF toolbar.
Sharing in a virtual meeting
Now that you have your slides showing in a browser window, it is easy to share that window in your meeting platform. If you want an advanced sharing option where you have your video beside your slides in a separate browser window, adapt the ideas in this article.
Navigating the slides
Move to the next/previous slide
Do not use the up and down arrows or the mouse wheel to scroll through your slides. It is a much better experience for the viewers if each slide moves cleanly to the next slide.
On Windows, use the PageUp and PageDown keys on your keyboard. On some laptops this may require a Fn key to be held with the up and down arrow keys. On a Mac hold the Option key and press the up and down arrow keys. If you accidentally scroll part way on a slide, use these page movement keys to reset the view.
Jump to any slide
On the left side of the Edge PDF toolbar is a page number field. You can jump to any slide by typing the slide/page number into that field.
If you want to see smaller views of your slides so that you can scroll to find a specific slide, you can change the Page view in the Edge PDF toolbar to see two pages beside each other.

With this setting, you will likely be able to see four slides at a time in the browser.
Scroll up or down to find the slide you want. Position it in the middle of the browser window. Use the Page view option to switch back to the Single page view. You may have to advance or back up a slide to get to the one you want.
Search for a slide based on the text in the slide
To the right of the page number field in the Edge PDF toolbar is a magnifying glass icon. This is the search function and it allows you to search for text in the file. As long as the text was editable in the source program, it should be searchable in the PDF file. This can also be a good way to quickly locate a slide based on the text that is on the slide.
Engaging the attendees
One of the great features of the Edge browser when viewing PDF files is the ability to use annotation tools. You will see the drawing, highlighter, and eraser tools in the Edge PDF toolbar. I’ve covered these tools in detail in this section of my video on using the Edge browser in presentations. In late October 2021 Microsoft added text annotations to the Edge PDF toolbar so now you can add text, such as a comment from an attendee or filling in a blank in a slide.
Because you are using the Edge browser to present, you can take advantage of having other content in other browser tabs. It is easy to switch to another browser tab to show content such as a video, a website or a spreadsheet. Because you have shared the browser window in the meeting, the attendees see a seamless switch to the new content. I cover other content options you may want to consider in this article.
Edge gives you an easy way to zoom in and pan around a slide when showing the PDF. If you are using a trackpad, use two fingers to pinch to zoom in on the slide. Then use two fingers on the trackpad to pan around the slide.
If you are using a mouse, hold the Control key and scroll with the mouse wheel to zoom in or out on the slide. Once you have zoomed in and want to pan around the slide, scroll up or down with the mouse wheel or hold the Shift key down and use the mouse wheel to scroll left or right (the same trackpad, key and mouse combinations work in Windows and on the Mac).
Use the Fit to width and Fit to Page buttons described earlier to return to the full slide view. Depending on what part of the slide is in view, you may need to move one slide ahead or back to get back to the correct slide. Here’s an example of using this zoom and pan technique in Edge to explain a complex diagram on a slide.
Advanced navigation
One of the advantages of saving the PDF using the methods I described earlier is that it maintains the links you have added to slides. Whether you used Slide Zoom in PowerPoint or added links to other slides on shapes in PowerPoint, Google Slides, or Keynote, those clickable links work when you show the slides as a PDF in Edge.
This allows you to design links on the slides to easily jump between a slide in the main presentation and a backup slide in the Appendix. You can also set up a menu of links at the bottom of the slides to jump between sections of the presentation. And you can add a hidden link (using a transparent shape) to the slide master to be able to jump back to a menu slide from any slide.
To activate a link, just move your mouse on top of the link. The cursor will change to the hand cursor. Click the link and the PDF will jump to that slide.
The preserving of links makes the PDF version very versatile. Think about how you might use linking and build those links into the presentation when you are creating it.
Conclusion
Whether you are forced to use a PDF of your slides to present or choose to do so, use the ideas in this article to make the presentation more effective.
Where to go next
–>More articles on virtual presenting –>Training for your team on presenting virtually
–>More articles on virtual & hybrid sales presentations –>Training for your sales team

Dave Paradi has over twenty-two years of experience delivering customized training workshops to help business professionals improve their presentations. He has written ten books and over 600 articles on the topic of effective presentations and his ideas have appeared in publications around the world. His focus is on helping corporate professionals visually communicate the messages in their data so they don’t overwhelm and confuse executives. Dave is one of fewer than ten people in North America recognized by Microsoft with the Most Valuable Professional Award for his contributions to the Excel, PowerPoint, and Teams communities. His articles and videos on virtual presenting have been viewed over 4.8 million times and liked over 17,000 times on YouTube.