When most presentations were done in meeting rooms, PowerPoint’s Presenter View was used to primarily to see your speaking notes while the audience saw just your slide. Now that most presentations have moved online in platforms such as Zoom or Microsoft Teams, Presenter View’s other features are available since you are sitting at the keyboard and can easily access them.
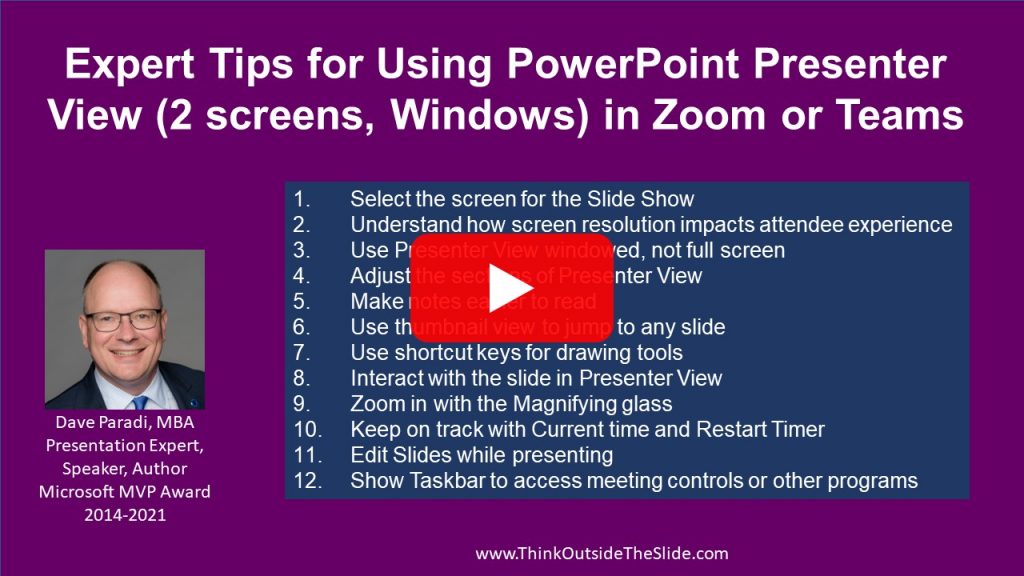
In this article I want to share some of the expert tips for using the features of Presenter View. I will use the common scenario of Presenter View showing on one screen while the slides show on a second screen which is shared in the meeting platform. This allows easy access to all the Presenter View features.
If you need to add a second screen, check out the options in this article and if you want to learn more about using Presenter View in different setups, I have complete guides to using Presenter View in Zoom and in Teams.
Select the screen for the Slide Show
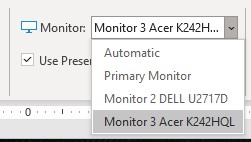
By default, PowerPoint decides which screen should have the slide show and which screen should have Presenter View. You can tell PowerPoint which screen you want the slide show on so that you can have the Presenter View on the screen that has your webcam. On the Slide Show ribbon, in the Monitors section, check the checkbox to use Presenter View and use the drop-down list to select the monitor PowerPoint should use for the slide show.
Here is the section of my video that shows this tip.
Screen resolution impacts attendee experience
When you are selecting the screen for the slide show, be careful about selecting a high-resolution screen. The higher the resolution, the more pixels have to be sent to the meeting platform and then on to the attendees. There is a longer delay between when you display a slide or build and when the attendees see it if you share a high-resolution screen. I have seen noticeable differences between sharing a 2K screen (2560×1440) versus an FHD screen (1920×1080). It may not seem like there is much of a difference in the resolution, but the 2K screen has to send almost 78% more pixels than the FHD screen. This results in the attendees seeing what you share with a longer delay. I suggest you use an FHD screen or a lower resolution screen instead of a high-resolution screen for the slide show.
Here is the section of my video that shows this tip.
Use Presenter View windowed, not full screen
By default, Presenter View opens in full screen mode on one screen while the slides open full screen on the other screen. The slides are always full screen and should be since you are sharing that screen with the audience. In the top right corner of the Presenter View you will see that you can click on the icon to move from full screen ode into windowed mode. This allows you to resize the Presenter View window.
By resizing the Presenter View window, you can see the meeting platform controls and other participant videos. You can also position the Presenter View Window right below your webcam so that when you are delivering the presentation, you can look at the slides and notes in Presenter View and the attendees will feel like you are speaking directly to them (this article discusses looking at the screen instead of the webcam when presenting).
Here is the section of my video that shows this tip.
Adjust the sections of Presenter View
There are three main sections in Presenter View: the current slide, the upcoming build/slide, and your notes. You can adjust the vertical and horizontal dividers in Presenter View to make the sections larger or smaller as desired. Some presenters find the preview of the next build or slide to be distracting so they make it very small. Try different sizes for each section to see what works best for you.
Here is the section of my video that shows this tip.
Make notes easier to read
At the bottom of the notes section in Presenter View you can use the font increase and decrease buttons to make the text larger or smaller. Find a text size that is easy to read allows all of your notes to be seen without scrolling. Scrolling to see the rest of your notes takes your concentration away from delivering your presentation. If your notes are lengthy, cut them down to the key reminders instead of a script.
Here is the section of my video that shows this tip.
Use thumbnail view to jump to any slide
Presenter View offers you the opportunity to see thumbnails of all of your slides without the audience seeing the thumbnails. Click on the thumbnail button below the current slide in Presenter View to enter this mode.
You now see all of your slides and can scroll through them. You can make the thumbnails bigger or smaller by using the zoom slider in the lower right corner or by holding the Ctrl key and scrolling your mouse wheel. If your PowerPoint file has sections, you will see the thumbnails organized by section and a menu of sections on the left. You can drag the vertical divider between the section list and the slide thumbnails if you want to see more of the section names displayed.
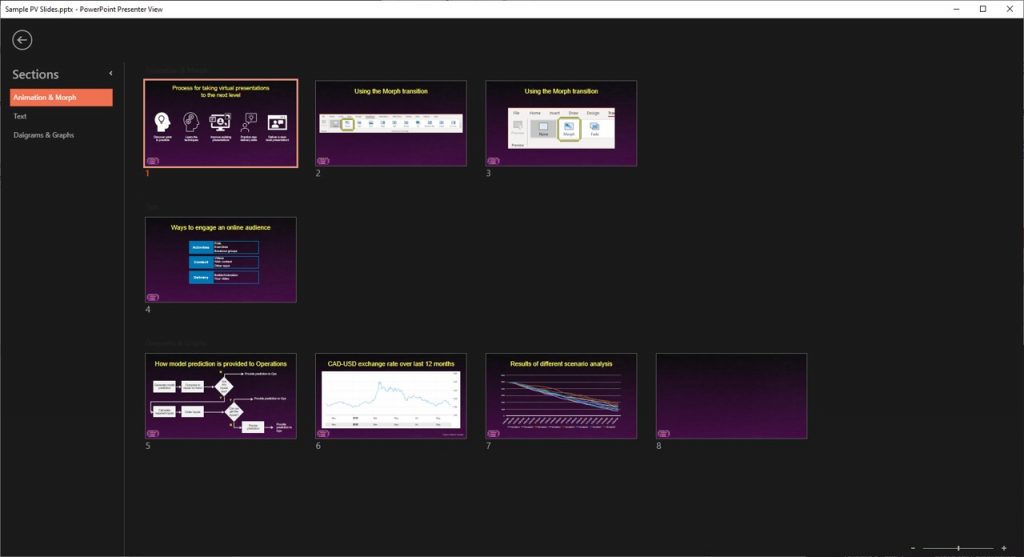
You can jump directly to any slide by clicking on the thumbnail in this view. This allows you to skip ahead in your presentation if you are running short of time. It also allows you to jump to a backup slide to answer a question and then jump back to where you were in the presentation. This is a smooth and seamless method of accessing other slides in your presentation.
If you don’t want to change the slide you are showing, you can click on the Back arrow button in the top left corner of this view to return to the slide you were on.
Here is the section of my video that shows this tip.
Use shortcut keys for drawing tools
Presenter View allows you to use the same shortcut keys for the drawing tools that are available in Slide Show mode. You can use the following shortcut keys:
Ctrl+L to change the cursor to the laser pointer
Ctrl+P to change the cursor to the pen
Ctrl+I to change the cursor to the highlighter pen
E to erase the drawings
Esc will return your cursor to the normal arrow
If you want to change any options of these drawing tools, you can do so in the drawing tool interface in Presenter View.
Here is the section of my video that shows this tip.
Interact with the slide in Presenter View
When you want to use the drawing tools, use them on the current slide in Presenter View instead of on the screen that contains the Slide Show. It is easier to manage drawing on the screen you are focused on.
You can also click on any links on the current slide in Presenter View instead of moving the mouse to the full screen Slide Show slide. The cursor is not seen by the audience when you move it over the current slide in Presenter View so the audience won’t see what you are doing. The cursor is seen when moved on the slide on the Slide Show screen. For example, this allows you to click on a Slide Zoom link to jump to a backup slide.
Here is the section of my video that shows this tip.
Zoom in with the Magnifying glass
Presenter View has a magnifier tool that can help us focus the audience when explaining a complex visual.
By clicking on the magnifying glass icon, a rectangle appears that you can position over a portion of the slide that you want to zoom in on. When you click the mouse button, that section of the slide is enlarged for the audience. The enlarging is done using the original resolution that is displayed so it can appear slightly fuzzy in some situations.
Once in this zoomed in state, the cursor turns into a hand cursor that allows you to drag the slide around to show a zoomed in view of other parts of the slide. You can use this to zoom in on a complex diagram and pan around to other parts as you explain each to the audience. You can use this to start at one end of a time-based graph and move along the timeline explaining the data along the way. This can be a good tool that enhances your explanation of a complex visual. To return to the regular view of the slide, just press the Escape key.
Here is the section of my video that shows this tip.
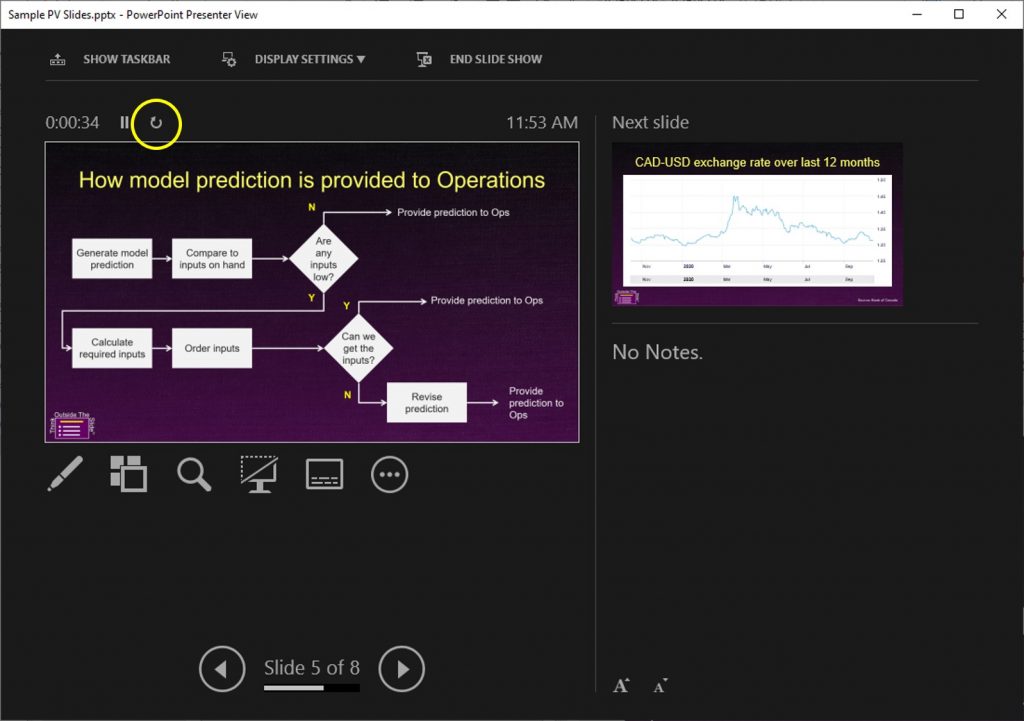
Restart Timer
Presenter View has a timer above the left corner of the current slide that shows you how long you have been in Presenter View. It can be used to let you know how long you have been speaking if you are delivering a time limited session. Since often in a virtual meeting we have Presenter View open before we share the screen with the audience, the timer likely has started well before you actually begin your presentation. You can click on the restart button to the right of the timer display to start the timer at zero again just before you start speaking so that the timer is an accurate reflection of how long you have been speaking.
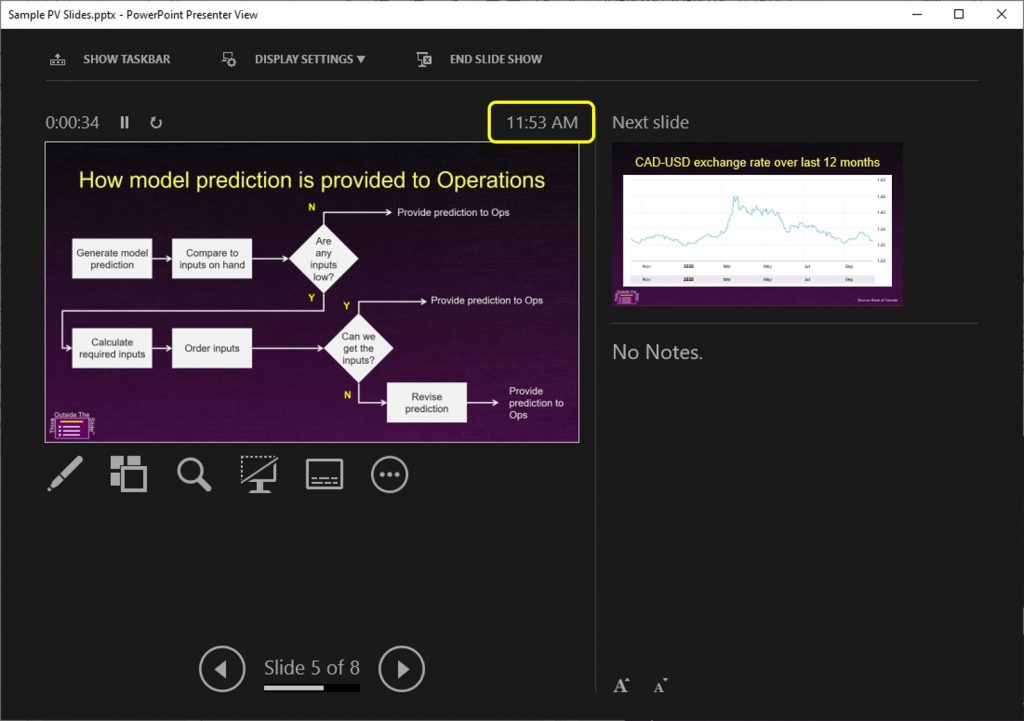
Current time display
Above the top right corner of the current slide is a display of the current time based on the time of your computer. For sessions where you need to end by a certain time regardless of when you started, this gives you a place to quickly glance to see how much time you have left.
Here is the section of my video that shows these two tips.
Edit Slides while presenting
By default, PowerPoint turns on an option called Keep Slides Updated. This is an option on the Slide Show ribbon and it can also be toggled by right-clicking on Presenter View. This option displays any changes made to the slides in real time while you are presenting. Here’s how you can use this to your advantage.
If you want to edit the current or a future slide, click on the normal PowerPoint editing window that is behind the Presenter View window. Make any changes and they will be reflected when the slide is displayed. This even happens when you are changing the currently displayed slide. You can use this to update a list of action items during the meeting so that when you get to the list at the end it is current. You can also use this feature to display different data series in a chart on the current slide while presenting by using the chart filter skittle. You can also add content to a slide, such as adding a callout or text box note to a slide for the attendees to see and it will be part of the slides that those viewing the slides later will see.
Here is the section of my video that shows this tip.
Show Taskbar to access meeting controls or other programs
In the top left corner of Presenter View is a button named Show Taskbar.
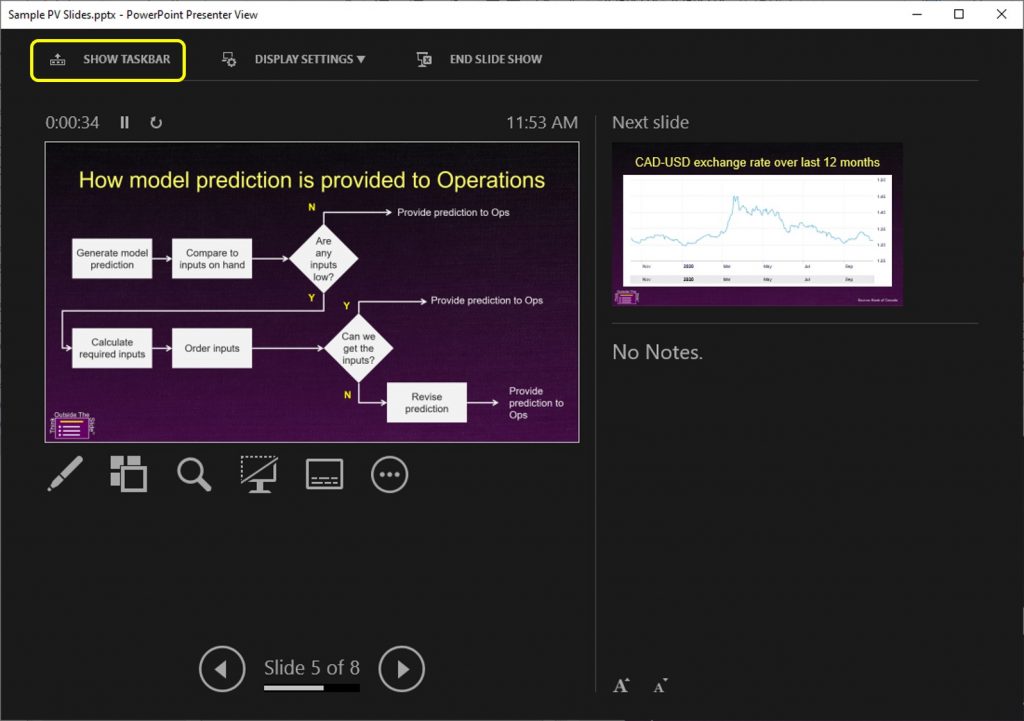
It can be used when in full screen mode to show the Windows taskbar. By showing the Windows taskbar, you can open another program or switch to another open program such as the meeting platform software. Be aware that if that program opens on the screen you are sharing, the audience will see it, so you may want to move all apps off the screen you are planning to share before you start your presentation. The Show Taskbar button toggles the taskbar off when you are done if it does not disappear due to you minimizing or closing an app window.
Here is the section of my video that shows this tip.
Video demonstrating all the tips

Dave Paradi has over twenty-two years of experience delivering customized training workshops to help business professionals improve their presentations. He has written ten books and over 600 articles on the topic of effective presentations and his ideas have appeared in publications around the world. His focus is on helping corporate professionals visually communicate the messages in their data so they don’t overwhelm and confuse executives. Dave is one of fewer than ten people in North America recognized by Microsoft with the Most Valuable Professional Award for his contributions to the Excel, PowerPoint, and Teams communities. His articles and videos on virtual presenting have been viewed over 4.8 million times and liked over 17,000 times on YouTube.