The challenge this can solve
If you only have a single screen and want to use PowerPoint’s Presenter View so you can see your speaking notes and the current slide, you have a challenge when presenting in Teams or Zoom. There are some ways to do this with a single screen but they have their potential issues and the quality for the audience can depend on the platform and your screen resolution.
This method creates a “virtual” second screen on your laptop so that Presenter View can display the slides on the second screen which you share in the meeting so the audience sees your slides clearly. You see Presenter View and can see your notes and use the expert features of Presenter View on your laptop.
Overview of how this works
To create a second screen, you connect an HDMI cable to the regular video output on your laptop. The HDMI cable goes into a video capture card that is plugged into a USB port on your laptop. The video capture card appears to your computer as a second screen that can now be used with PowerPoint’s Presenter View just like a physical second screen.
(The Windows version of this article is here.)
What is a video capture card?
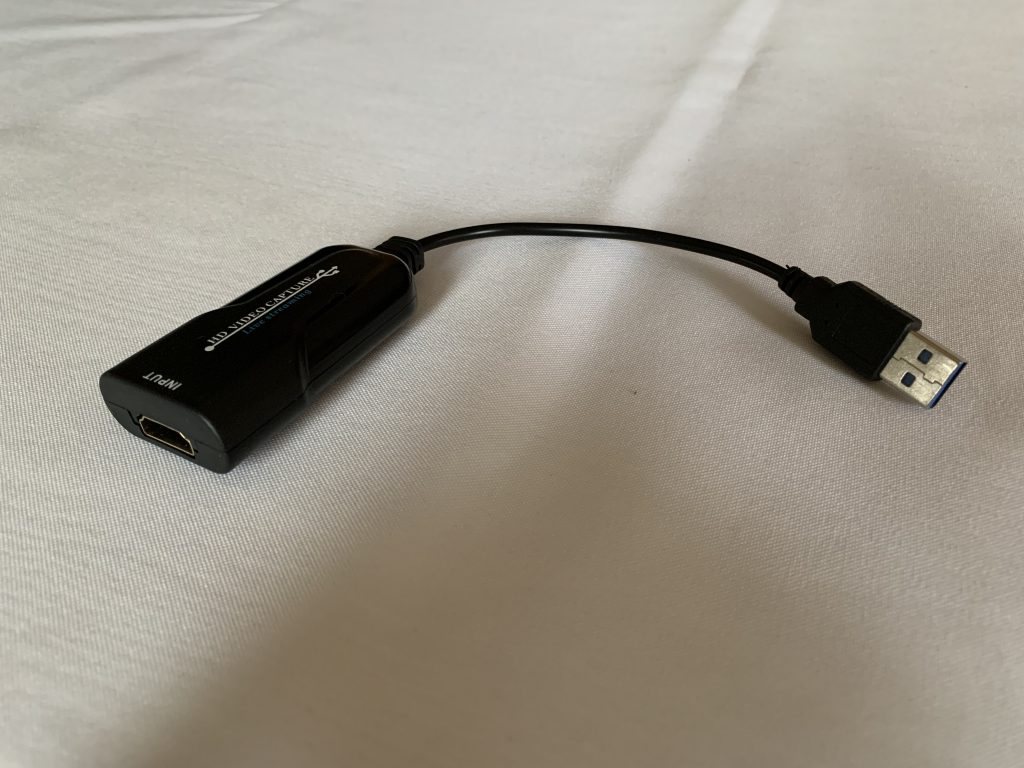
A video capture card is not actually a card, the name is a holdover from when expansion cards were installed in desktop computers. The device has on one end an HDMI port where an HDMI cable gets connected. This is the video input source. On the other end it has a USB connector that plugs into a USB port on a computer and supplies the video source to the computer as a camera input. Here’s what my device looks like.
These devices are popular with gamers who use them to send their game play to streaming services. If you have a gamer in your house they may already have one of these devices.
When you look at these devices online, you will see many choices, ranging from under thirty dollars to several hundred dollars. For the purpose of a second screen you don’t need the high-end devices. Choose a device that has a USB 3 connection instead of the slower USB 2 connection. You won’t need a high resolution or frame rate that the gaming cards use, a maximum of 1920 x 1080 resolution and 30 frames per second (fps) is more than enough. I suggest you look for one that has a short cord between the HDMI end and the USB end instead of one that is more of a block style so that you don’t block any USB ports when you plug it in. Here’s the one I bought on Amazon and use: https://amzn.to/3bSZQqU. Certainly look at competing devices as well but I don’t think you need the high-end gaming devices.
Connect the card to your computer
Start by connecting the device to an open USB port on your laptop. If you are connecting it to a USB hub, you may want to use a powered hub to make sure it gets enough power when working to provide the video signal to your laptop. If your laptop only has USB-C ports and the device has a USB-A connector, make sure any adapter you use allows power and data to pass through.
After you connect the device your computer will download the correct driver and install it so the device works.
Connect an HDMI cable from a video output to the card
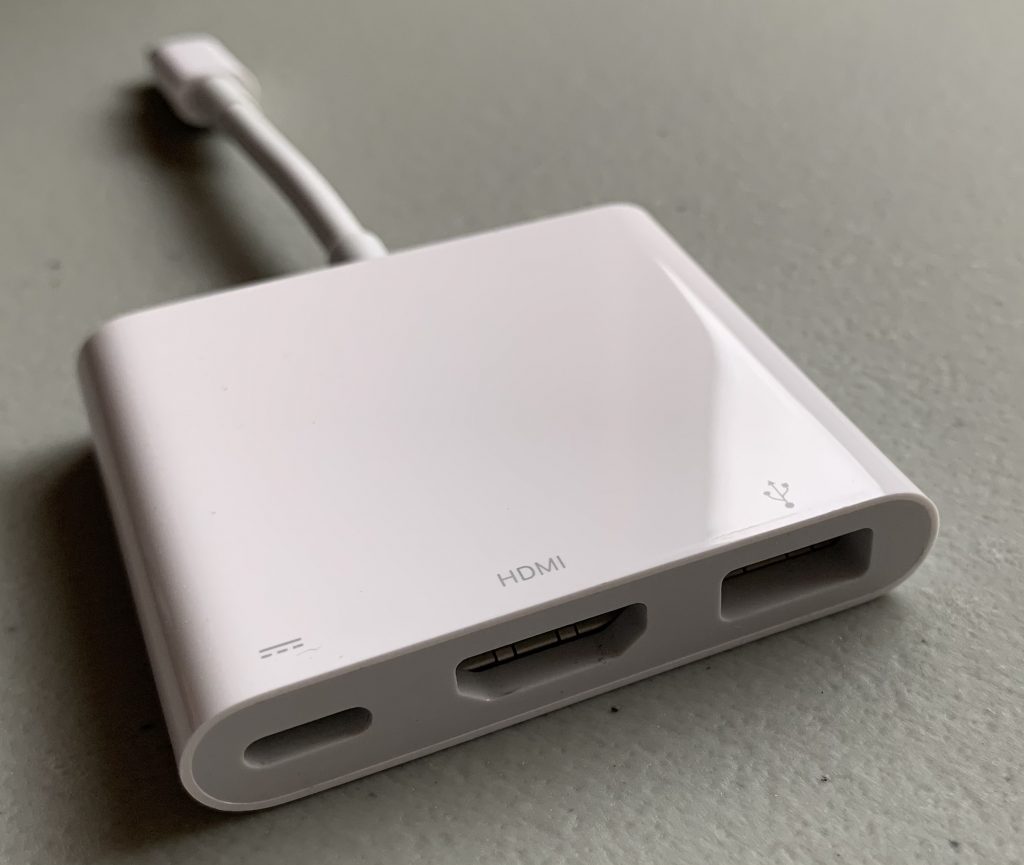
After the card is working, connect an HDMI cable from the HDMI output port on an adapter from a USB-C or mini-DisplayPort port. This is the Apple adapter from a USB-C port that offers and HDMI output and a USB input, which are the two ports we will need.
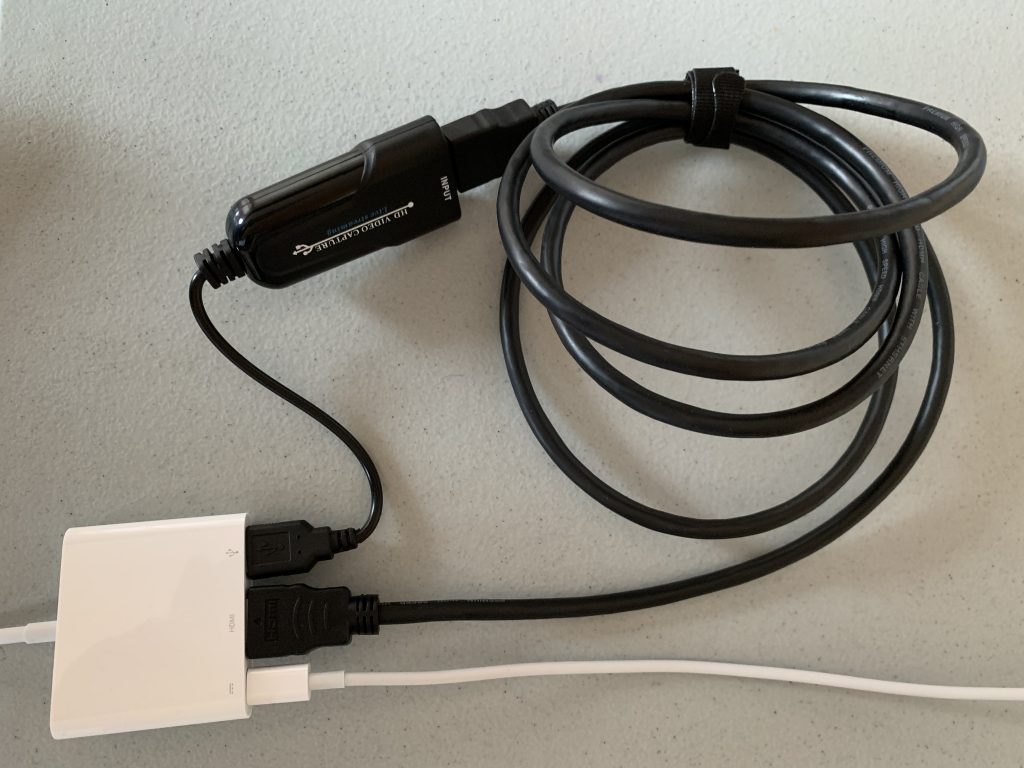
Here’s what it looks like with the adapter, capture card, and HDMI cable connected.
Extend your screen
Your laptop now thinks that it has a second screen attached. In the Display Settings Arrangement section, make sure that the Mirror Displays checkbox in unchecked so that the desktop is extended on to the “virtual” second screen.

Set up PowerPoint to use Presenter View and a second screen
Now that your laptop thinks it has a second screen, you can set up your PowerPoint file to use Presenter View and select which screen the slides should be displayed on. In PowerPoint on the Slide Show ribbon, click on the Set Up Slide Show button to open the dialog box. In the Monitors section use the drop-down list of monitors to select the video capture card (usually called Monitor 2) as the monitor to display the slide show on.

Start Presenter View
Start your presentation in Slide Show mode using the Presenter View button on the Slide Show ribbon.

You should see Presenter View fill your laptop screen. You can confirm that there is a second screen showing the slides by clicking on the Swap Displays button in Presenter View which swaps the Slide Show and Presenter View between the laptop screen and the “virtual” second screen.

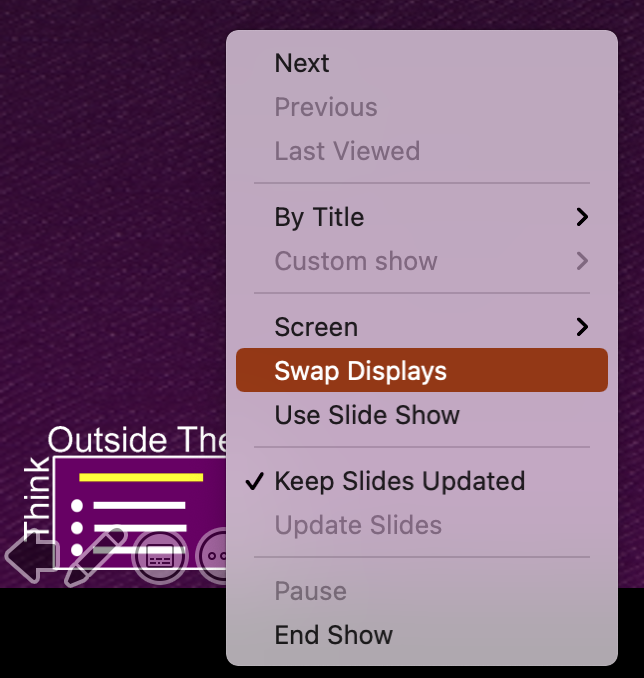
When viewing the Slide Show on the laptop you can return to Presenter View by clicking on the three dots in the lower left corner of the slide and selecting Swap Displays in the menu that appears.
Share second screen in Teams or Zoom
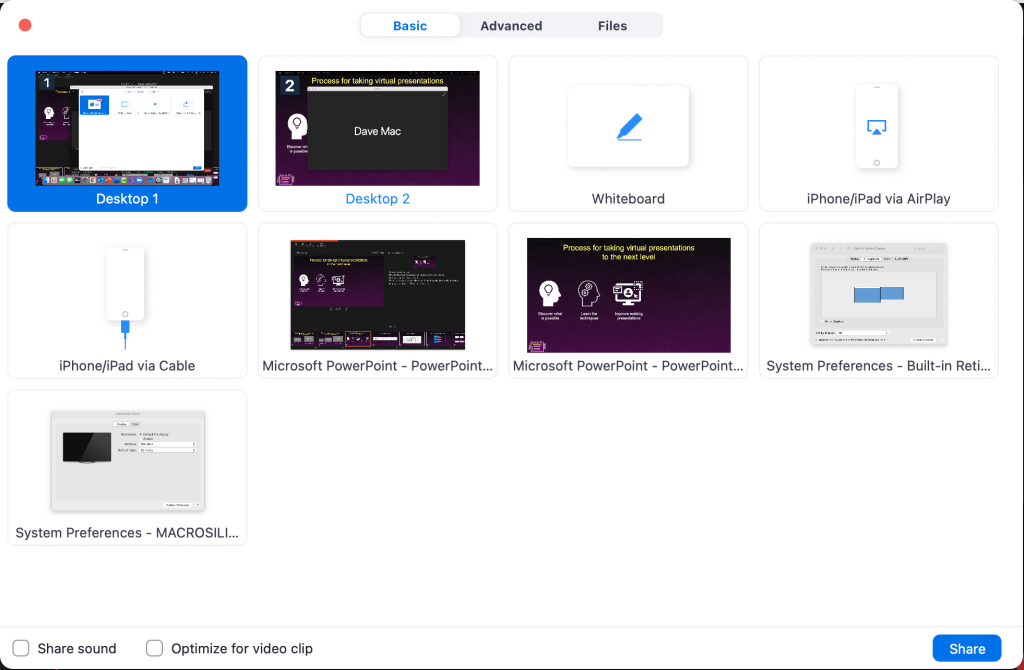
Use Command+Tab to return to the meeting platform controls since Presenter View takes up the entire screen. In Teams or Zoom, share the second screen, the one with the slides being shown full screen. Here’s what the Zoom sharing dialog would look like (Desktop 2 would be shared).
Since your laptop recognizes a second screen, this same method of sharing the second screen should also work in Webex, Google Meet, or any other meeting platform.
Deliver your presentation using Presenter View
Once the audience sees the screen with your slides, you can start delivering your presentation using Presenter View. Don’t forget that Presenter View has some features that you make great use of in virtual presentations as you can see in this article and video.
When done, end the presentation and disconnect the card & cables
Since PowerPoint thinks you have a second screen connected, end your presentation the same way you would if you had a physical second screen. Stop sharing the screen in the meeting platform, end the meeting, and disconnect the HDMI cable and the video capture card. In most cases the laptop will recognize the video capture card the next time you connect it and extend the desktop instead of using the default of duplicating it.
Advantages of this method
There are a number of advantages of using this method of creating a second screen to use PowerPoint’s Presenter View, including:
- You don’t have to find or purchase a second screen and find room for it on your desk.
- The adapter is much less expensive than a second screen.
- This method does not require you to install software on your corporate laptop so it won’t be blocked by IT restrictions.
- Your slides will be higher resolution and clearer to the audience than if you shared a portion of your screen in Zoom. This is especially true if you don’t have a high-res screen.
- You can see what is on the second screen and tell if anything goes wrong.
- On a Mac it is the only way I know of to use Presenter View with a single screen because Teams does not allow sharing a portion of your screen like Zoom does.
Try this method if you only have your laptop screen
If you just have your laptop screen and want to use Presenter View in PowerPoint to see your notes and use the expert features to be more effective when presenting, try this method of using a video capture card to create a “virtual” second screen.
Video of this technique
The video below shows me connecting my video capture card to my laptop and the steps above to share my slide show on the “virtual” second screen in a Zoom meeting in Windows. The steps are similar for a Mac so use this video as a reference along with the screen capture images in the article above.

Dave Paradi has over twenty-two years of experience delivering customized training workshops to help business professionals improve their presentations. He has written ten books and over 600 articles on the topic of effective presentations and his ideas have appeared in publications around the world. His focus is on helping corporate professionals visually communicate the messages in their data so they don’t overwhelm and confuse executives. Dave is one of fewer than ten people in North America recognized by Microsoft with the Most Valuable Professional Award for his contributions to the Excel, PowerPoint, and Teams communities. His articles and videos on virtual presenting have been viewed over 4.8 million times and liked over 17,000 times on YouTube.