Recently Microsoft introduced a feature to their Teams meeting platform that allows participants to use a custom background. A future update in the Windows app (this feature is currently only available in the Windows app) will allow users to upload their own images to use as the background. But you can create and upload your own background now if you know how to create the image and how to get Teams to recognize it as one of the options. There are four steps:
- Create the background in PowerPoint
- Save the image file
- Make the image available to Teams
- Use the image as your Teams background
Create the background in PowerPoint
Using PowerPoint to create a background image gives you the flexibility to use not only pictures, but logos, shapes, icons, and text. This allows you to create a branded custom background.
Start with a new 16 x 9 sized PowerPoint file that uses the default black and white color theme. The 16 x 9 aspect ratio is usually the best to use since most webcams are in that ratio. If your image is a different size, Teams will crop it when using it as a background.
Add images, text, icons, or shapes. In this example, I have used a simple shape filled with a light colored texture and added my logo.
![]()
When Teams uses a custom background, the top of the image will usually be more visible than the bottom of the image because of where you will be positioned in the image. So place any text or logos at the top of the background that you create.
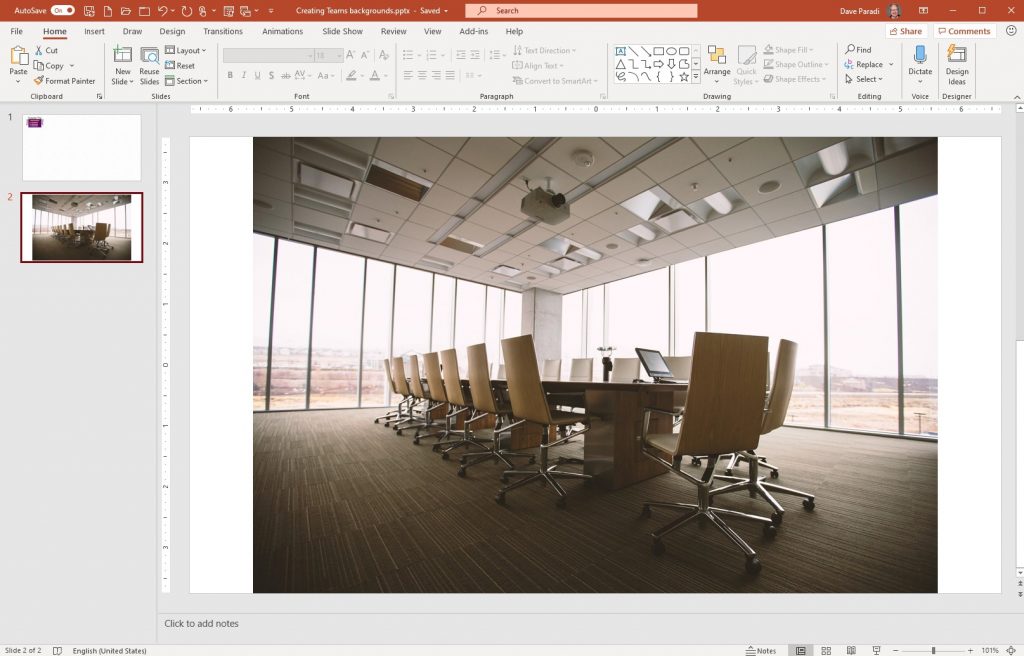
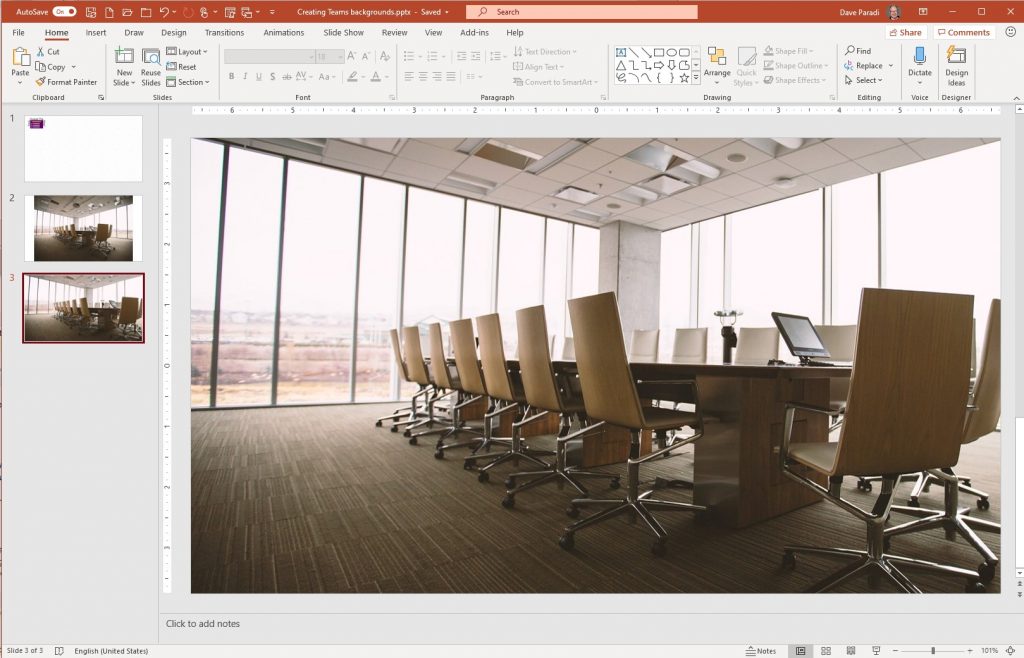
If you are using a photo, consider where you want to appear in the photo. Teams will place you in the middle of the background image, so if the photo you want to use has an object or area you want to appear to be beside, you will have to crop the image to position the object or area to one side. Here is an original image and a cropped version so that the table will be visible to one side when used as a Teams background.
Original image
Cropped for Teams background
Save the image file
Teams requires an image file. If you have used just a single image, click on the image to select it and skip to the next paragraph. If you have more than one object in your background, select all of the objects on the slide you have created. The easiest way to do this is to click on one object and then press Ctrl+A to select all objects on the slide.
Right-click on any selected object and select Save As Picture.
Select the JPEG file format and save the file with a name that indicates what it is. Remember what folder you saved the image in.
Make the image available to Teams
To allow Teams to use the image as a background, you must copy the image file to a specific folder. Microsoft will add an easier way to upload images in the future, but this is the method you must use at this time.
The folder you must copy the image to is %AppData%/Microsoft/Teams/Backgrounds/Uploads. The first part of the folder location, %AppData%, is a special Windows variable that locates the correct high level folder on your computer. To copy the background image file to this location, follow these steps.
- Open Windows Explorer (the file folder icon in Windows)
- Navigate to the folder where you saved the background image file
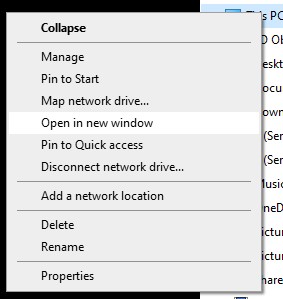
- Right-click on the This PC item in the list on the left side of the window and click on Open in new window
- Copy this text: %AppData%/Microsoft/Teams/Backgrounds/Uploads. In the address bar of the new window, paste this text in and press Enter. This will open the correct folder for custom Teams backgrounds.

- Switch to the Windows Explorer window where you saved the image file. Click on the image file and press Ctrl+C.
- Switch to the Windows Explorer window for the Teams background images. Press Ctrl+V to paste the image file in this location.
Use the image as your Teams background
The custom image background feature is currently only available in the Windows app. It is expected to come to apps on other platforms in the future.
In a Teams meeting, click on the three dots in the meeting control bar and select Show background effects. In the list on the right, your custom backgrounds will be at the bottom of the list sorted alphabetically by the file name you used. Click on the image you want to use and click the Apply button. You can then close the background pane.
Note: When you see your image on your own screen it will appear that the background is flipped horizontally. This is only your view. To your meeting attendees it will look correct.
Related link: Other articles on using Teams & Zoom
(last updated: April 26, 2020)

Dave Paradi has over twenty-two years of experience delivering customized training workshops to help business professionals improve their presentations. He has written ten books and over 600 articles on the topic of effective presentations and his ideas have appeared in publications around the world. His focus is on helping corporate professionals visually communicate the messages in their data so they don’t overwhelm and confuse executives. Dave is one of fewer than ten people in North America recognized by Microsoft with the Most Valuable Professional Award for his contributions to the Excel, PowerPoint, and Teams communities. His articles and videos on virtual presenting have been viewed over 4.8 million times and liked over 17,000 times on YouTube.