PowerPoint contains inking features that can be very useful to many presenters when creating slides. The challenge is that the way the default settings work, you might think you can’t use these features unless you have a touchscreen device. But you can use the inking features even if you don’t have a touchscreen. Here’s how in Office 365 and further down the page are instructions if you have Office 2016 or 2013 (all versions are for Windows; Mac versions have the Draw ribbon available only in Office 365 or Office 2019 using the first set of instructions).
Office 365
If you have a touchscreen laptop or tablet you will see the Draw ribbon in PowerPoint that allows you to access all these features. No touchscreen, no Draw ribbon. But you can add the Draw ribbon regardless of whether you have a touchscreen or not.
Step 1: Access the Ribbon Customization dialog box
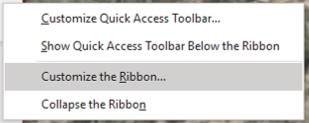
In PowerPoint, right-click in a blank area of any ribbon. The Slide Show or Review ribbon usually have a lot of blank space on the right side because they don’t have a lot of sections or buttons. In the menu that pops up, select the Customize the Ribbon option.
Step 2: Turn on the Draw ribbon
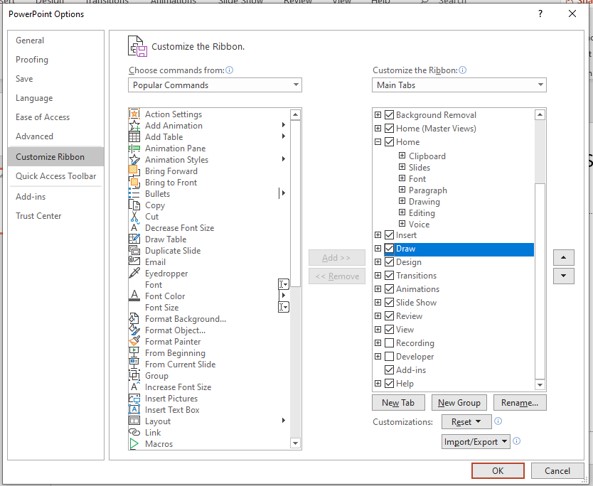
In the Ribbon Customization dialog box (it is actually one of the sections of the PowerPoint Options dialog box), look at the list of ribbons on the right side. Any ribbon with a checkmark beside it will be displayed by default. If you don’t have a touchscreen on your computer, the Draw ribbon will not have a checkmark. You can go ahead and check the checkbox beside the Draw ribbon name in the list. After you click the OK button at the bottom of the dialog box, you will now have access to all of the inking features of PowerPoint.
Office 2013/2016
In these versions of Office the inking tools are accessed via the Review ribbon. In the Review ribbon, click on the Start Inking button to display the Ink Tools/Pens ribbon. Now you can use those tools on the ribbon. This article from Microsoft explains this with screen capture images (select the Office 2013 & 2016 version option on the page).

Dave Paradi has over twenty-two years of experience delivering customized training workshops to help business professionals improve their presentations. He has written ten books and over 600 articles on the topic of effective presentations and his ideas have appeared in publications around the world. His focus is on helping corporate professionals visually communicate the messages in their data so they don’t overwhelm and confuse executives. Dave is one of fewer than ten people in North America recognized by Microsoft with the Most Valuable Professional Award for his contributions to the Excel, PowerPoint, and Teams communities. His articles and videos on virtual presenting have been viewed over 4.8 million times and liked over 17,000 times on YouTube.