Certain topics in presentations benefit from being illustrated with screen captures. If you are showing how to use a system or website, a screen capture is a great visual to use. Adding callouts to screen captures can make explaining the step-by-step process much easier than a series of bullet points.
While there are specialized screen captures programs available, a great utility has been built into Windows since Windows 7. It is called the Snipping Tool. It allows you to draw a rectangle around the section of the screen you want to capture. Once captured, you can copy the image for pasting into your presentation, or save the image to a file for later usage. If you will also need the image for a website or article, or you want to capture a series of images for usage later, save the captures to your computer.
The one challenge with using the Snipping Tool is that some programs close menus or options when you go to use the Snipping Tool. For example, in the latest version of PowerPoint, if I click on the “+” sign beside a graph to add or modify an element of the graph, this menu closes when I leave PowerPoint to use the Snipping Tool.
I recently needed to capture one of these types of menus and discovered a useful option in the Snipping Tool. In addition to the basic capture, which allows you to capture what is on the screen right now, the Snipping Tool allows you to delay for up to five seconds before you draw the capture rectangle. Here’s how this can be used.
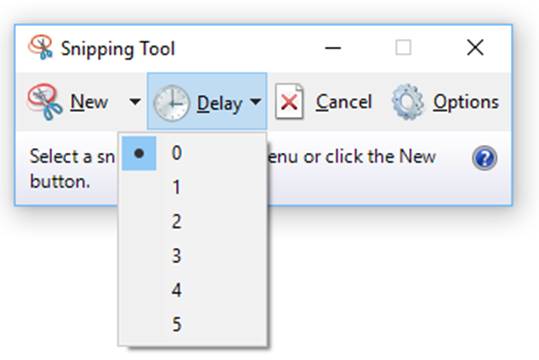
Set the delay to the number of seconds it will take to get the menu or item displayed in the program. Click the New button to do a new screen capture in the Snipping Tool. Switch over to the website or program and display the menu or item. When the number of seconds has elapsed, the Snipping Tool will come on and allow you to capture the screen in its current state.
Another issue presenters run into when using high resolution screen captures is the size of the image. With new 4K resolution screens on laptops and desktop computers, the size of the screen capture can be huge. When you paste it into PowerPoint, it is much larger than the slide. Instead of trying to scroll to find the edges of the image in order to resize it, use the sizing controls in the Picture Tools Format ribbon. On the right side of the ribbon, you will see controls like this.
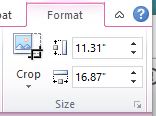
Click into the height setting and type in an appropriate size. Most of the time I will type in a height of six or seven inches (15 or 18 cm if your system uses metric). This will make the image fit into the slide in most situations. Then you can resize, crop, and position the screen capture as needed much more easily than scrolling around the area to find the edges of the image.
When you need to use screen captures in your presentations, check out the power of the Snipping Tool that is part of Windows.
P.S. For two other methods of capturing screens in Windows, see this article and download this video.

Dave Paradi has over twenty-two years of experience delivering customized training workshops to help business professionals improve their presentations. He has written ten books and over 600 articles on the topic of effective presentations and his ideas have appeared in publications around the world. His focus is on helping corporate professionals visually communicate the messages in their data so they don’t overwhelm and confuse executives. Dave is one of fewer than ten people in North America recognized by Microsoft with the Most Valuable Professional Award for his contributions to the Excel, PowerPoint, and Teams communities. His articles and videos on virtual presenting have been viewed over 4.8 million times and liked over 17,000 times on YouTube.